Your Setup Guide
Getting Started with Meili GPS
Everything that you need to know to get started with Meili GPS
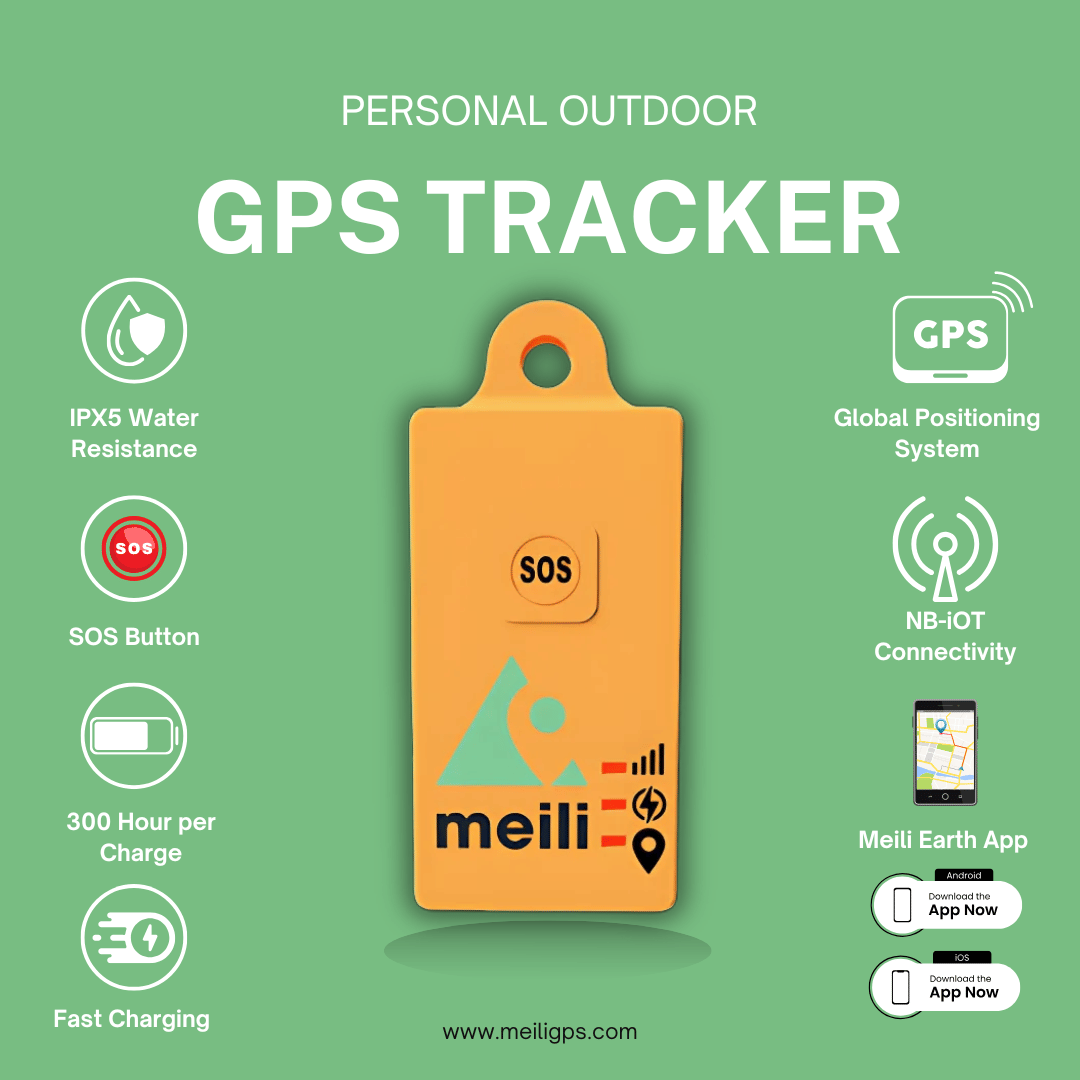
Getting to know your Meili
Your Meili GPS
Global Positioning System
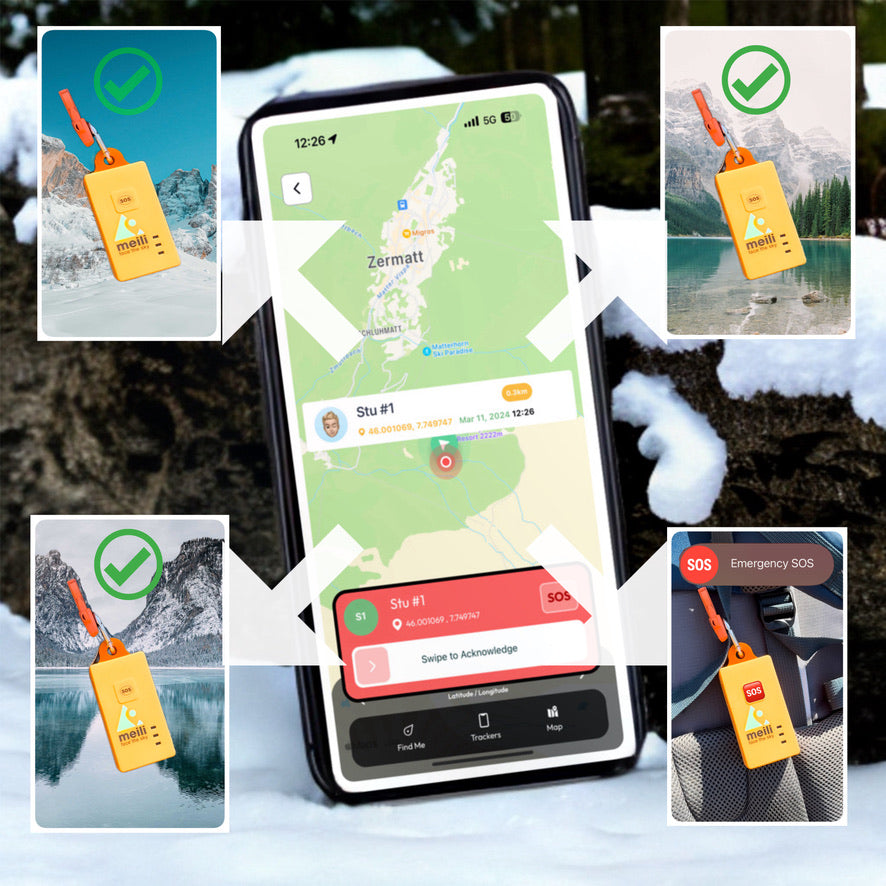
Your Meili is a GPS tracker that relies on being able to see the GPS Satellites in the sky around it. From these, it can work out where it is anywhere in the world with an accuracy of around 1m. To give it the best chance of getting a good location fix you should ensure it is able to get a good view of the sky. A good place would be at the top of your rucksack or clipped to the outside. It's best not to have anything metal on top of it or have it at the bottom of your bag as this will limit its ability to contact the satellites it needs to work out where it is.
Remember your Meili is communicating with satellites thousands of miles above you in space so give it the best chance of getting a good fix by making sure it can se the sky.
Communications
Your Meili also needs to be able to connect to our servers to be able to update its location in your app. Its uses a variety of methods to do this including being able to use all networks all over the world, not just one, like your phone, It also is able to use technologies such a NB-IOT and Cat M which let is connect in places far from a cell tower and in places your phone will not work.
Indicator Lights
There are three lights on the front.
The top one is the network indicator. It flashes slowly green when its got a good connection to the cellular network and fast when it is not connected.
The middle one is the battery monitor. Normally it's off but if it turns red then you should charge your Meili soon as it only has 10% charge left. It also flashes when its charging.
The bottom light is the GPS indicator. If its flashing blue then its looking for a GPS lock and turns solid when it has a lock.
The SOS Button
Finally the SOS button on the front is how you call for help from the person monitoring you. Press it until you feel a buzz to tell you the SOS has been sent. There is more detail on the SOS function in the user guides.
Rain and Water
Your meili is IPX5 water resistant which means it can stand weather and rain but you can't drop it in a lake. There are many options to make it water proof such as waterproof pouches and waterproof boxes, so if you need to to be fully water proof then we suggest one of those. If you need some advice then give us a shout.
Global Airtime Plan
Start here to setup Meili GPS
You need a Global Airtime Plan for each Meili GPS Tracker that you own.
You can signup by selecting Airtime Plans below.
Choose the number of Meili GPS Trackers you have and select whether you want to pay monthly or annually.
As part of the signup process you must enter your e-mail address and it is this address we will use to register your account.
Make sure this is accurate as you will need to confirm it with us when you start using the app.
Click here to goto the Airtime Plans Portal.
Airtime Plans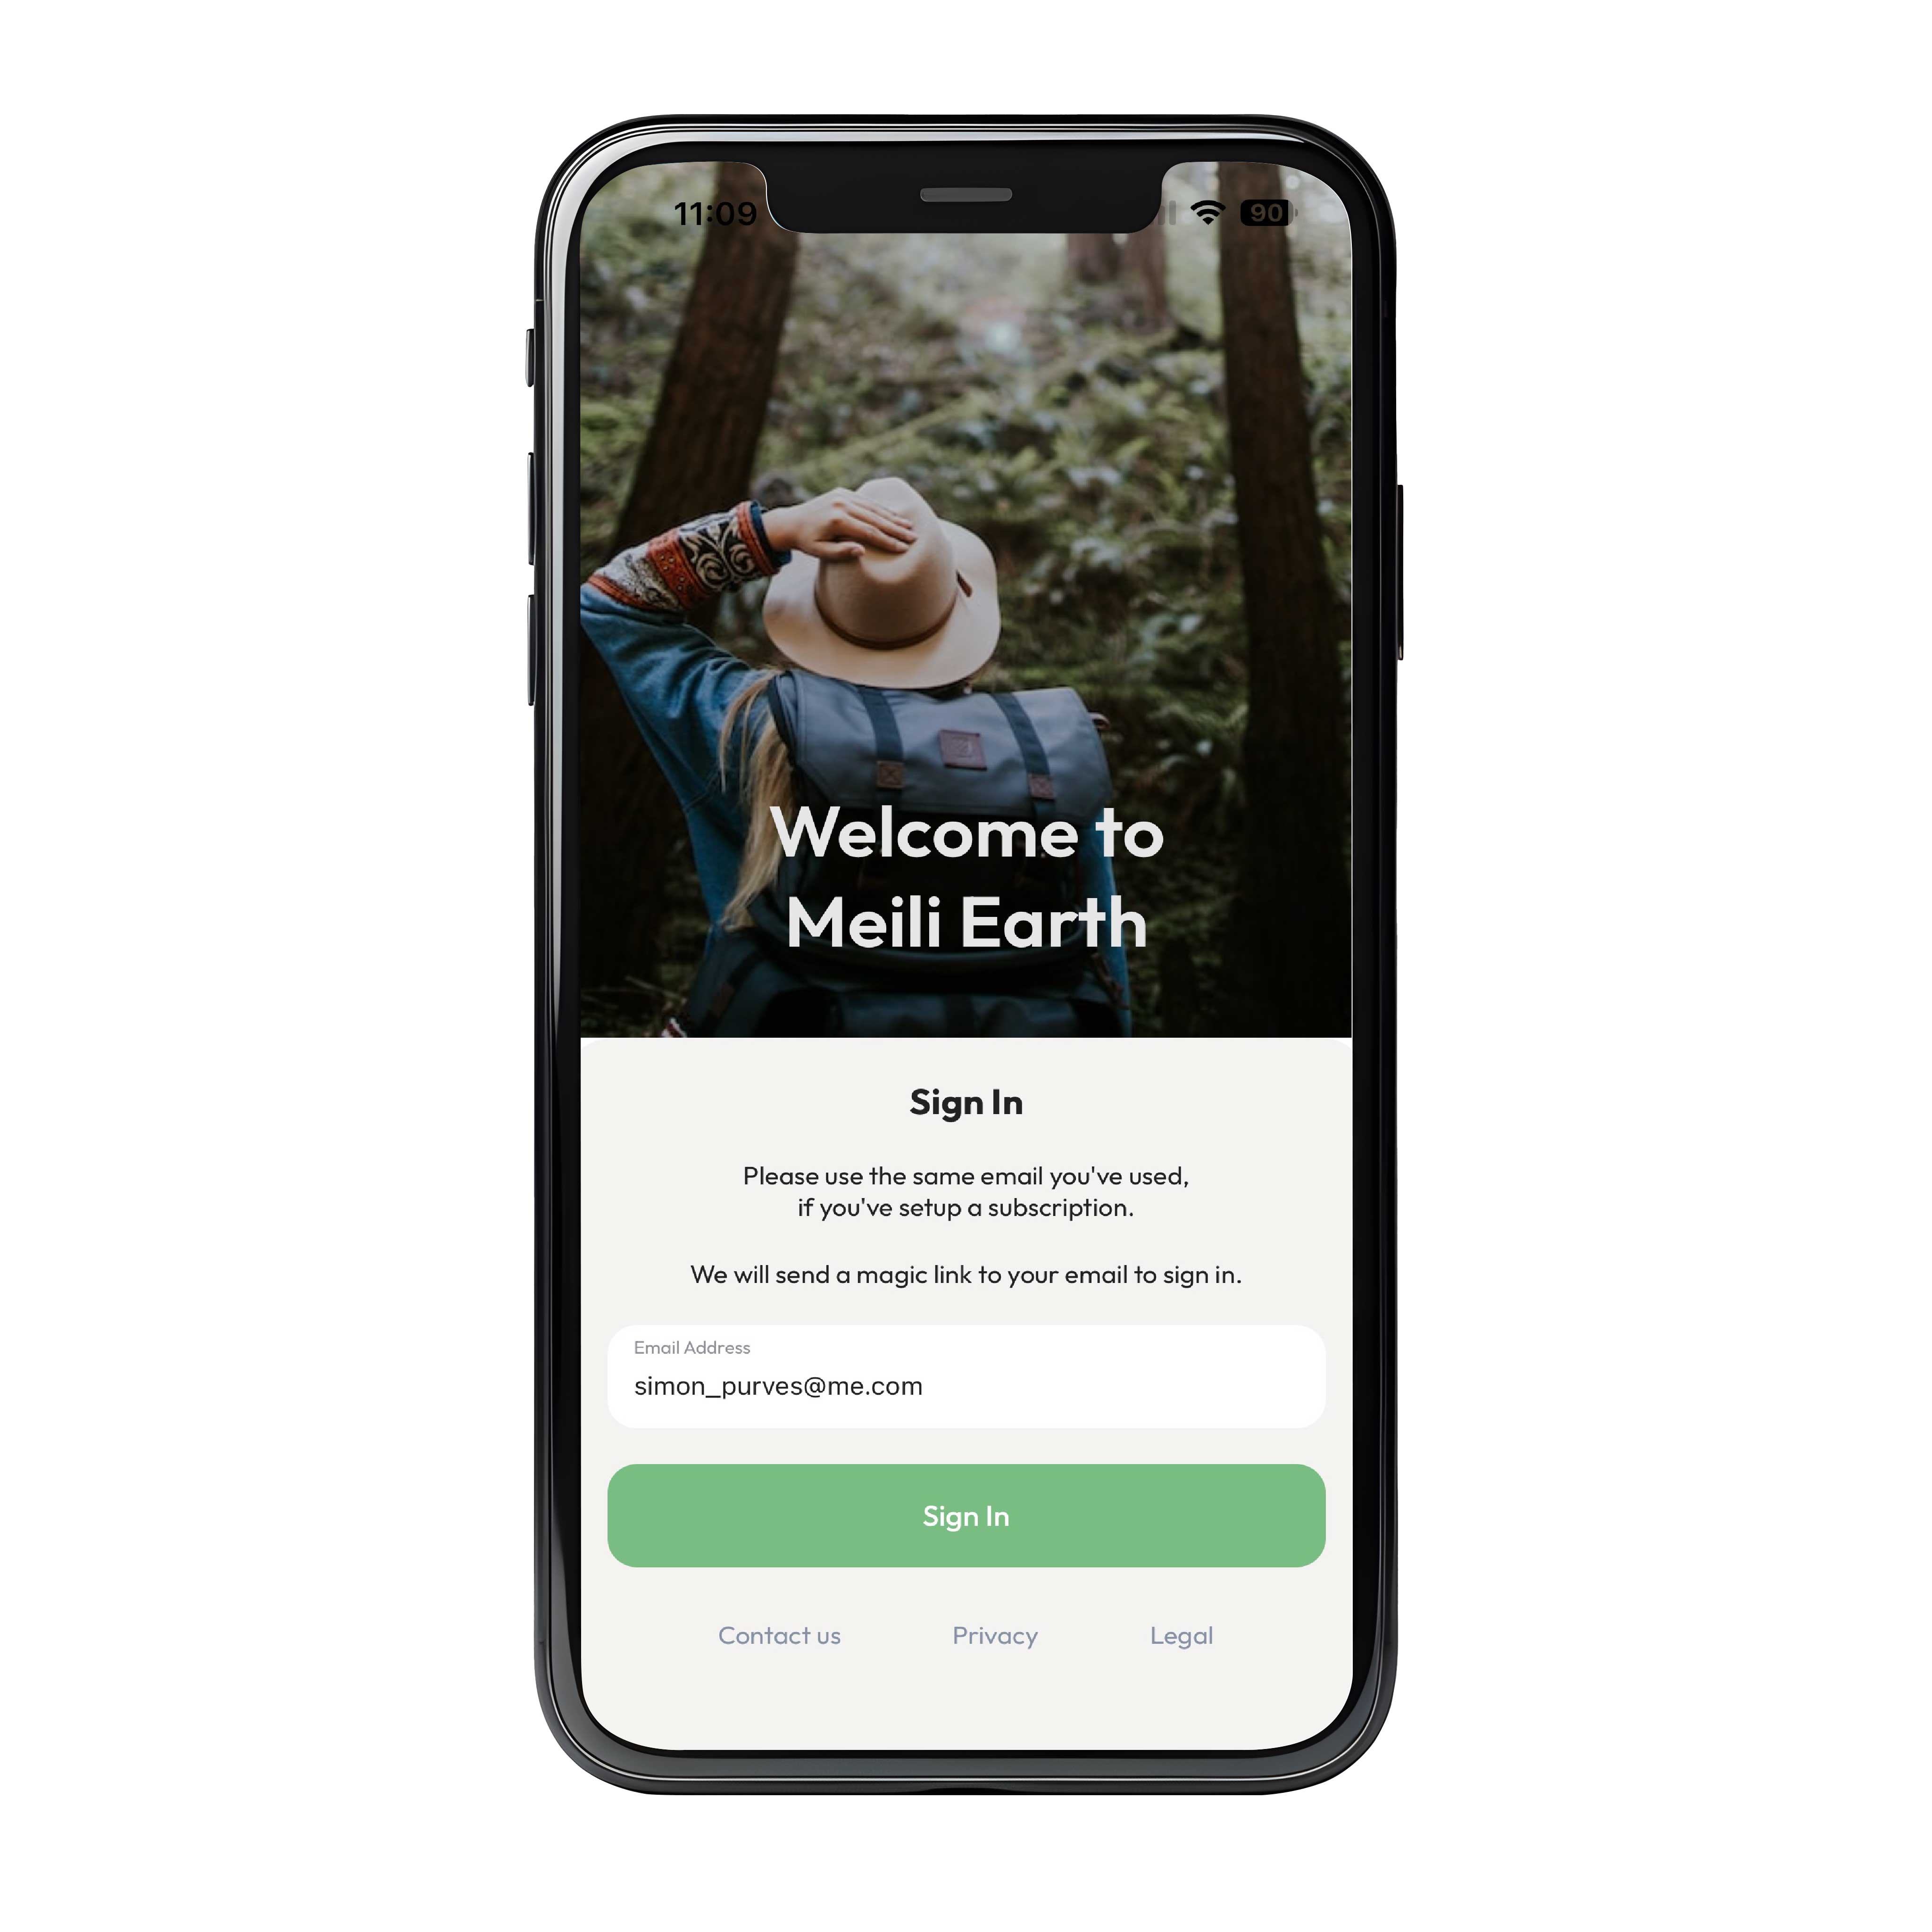
1. Install the Meili Earth App
Step 1
Go to the Apple App Store or the Google Play Store and select & install the Meili Earth App
If you are asked to allow notifications you must select 'yes' or you will not be able to login. we rely on notifications to add an extra layer of security to the login process.

2. Sign into the App
Step 2
Enter the same e-mail address you used to create the airtime plan on the website and click Sign In
You will see the button change to Check your E-mail
Go to your e-mail and click the button in the Meili email you receive to sign into Meili Earth.
Note that some e-mail systems are very strict about e-mail so you might need to check your spam folder for the e-mail.
Also you must enable notifications to login. You cannot login if you do not have notifications enabled.
3. Create your Profile
Step 3
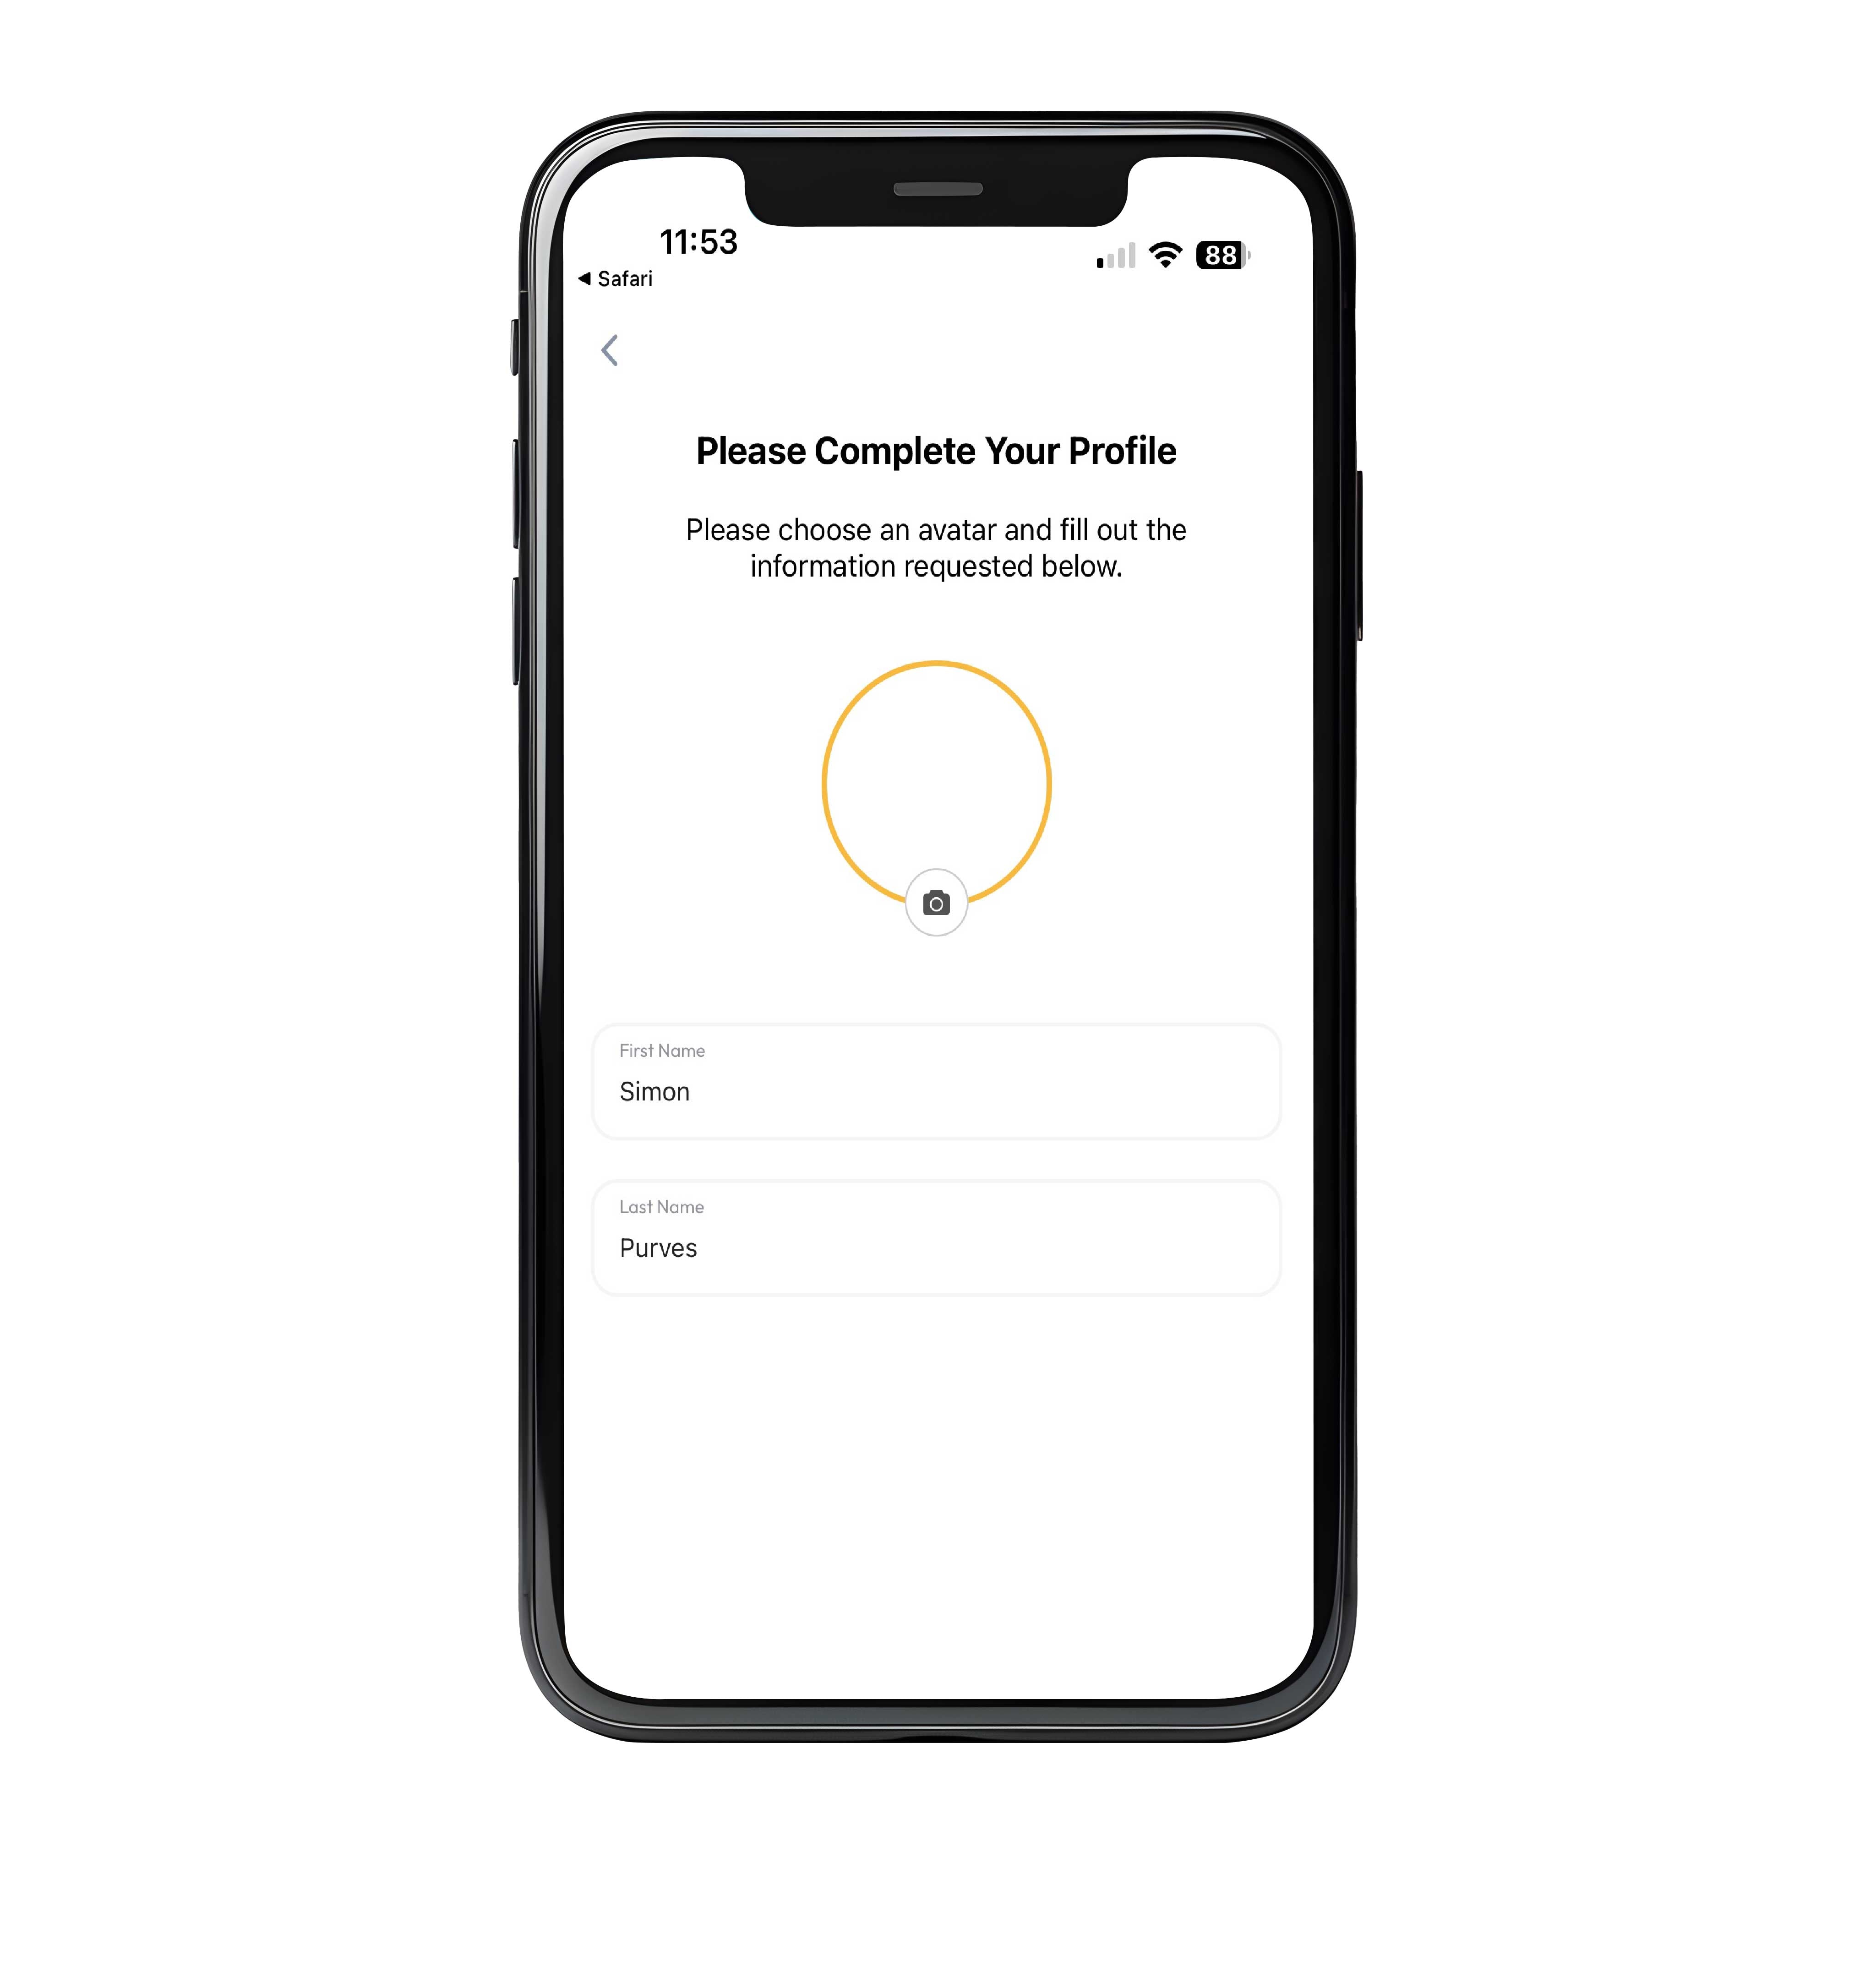
Add your profile details: enter your name.
You can choose an image from your photo album as an avatar.
4. Verify your Mobile Number
Step 4
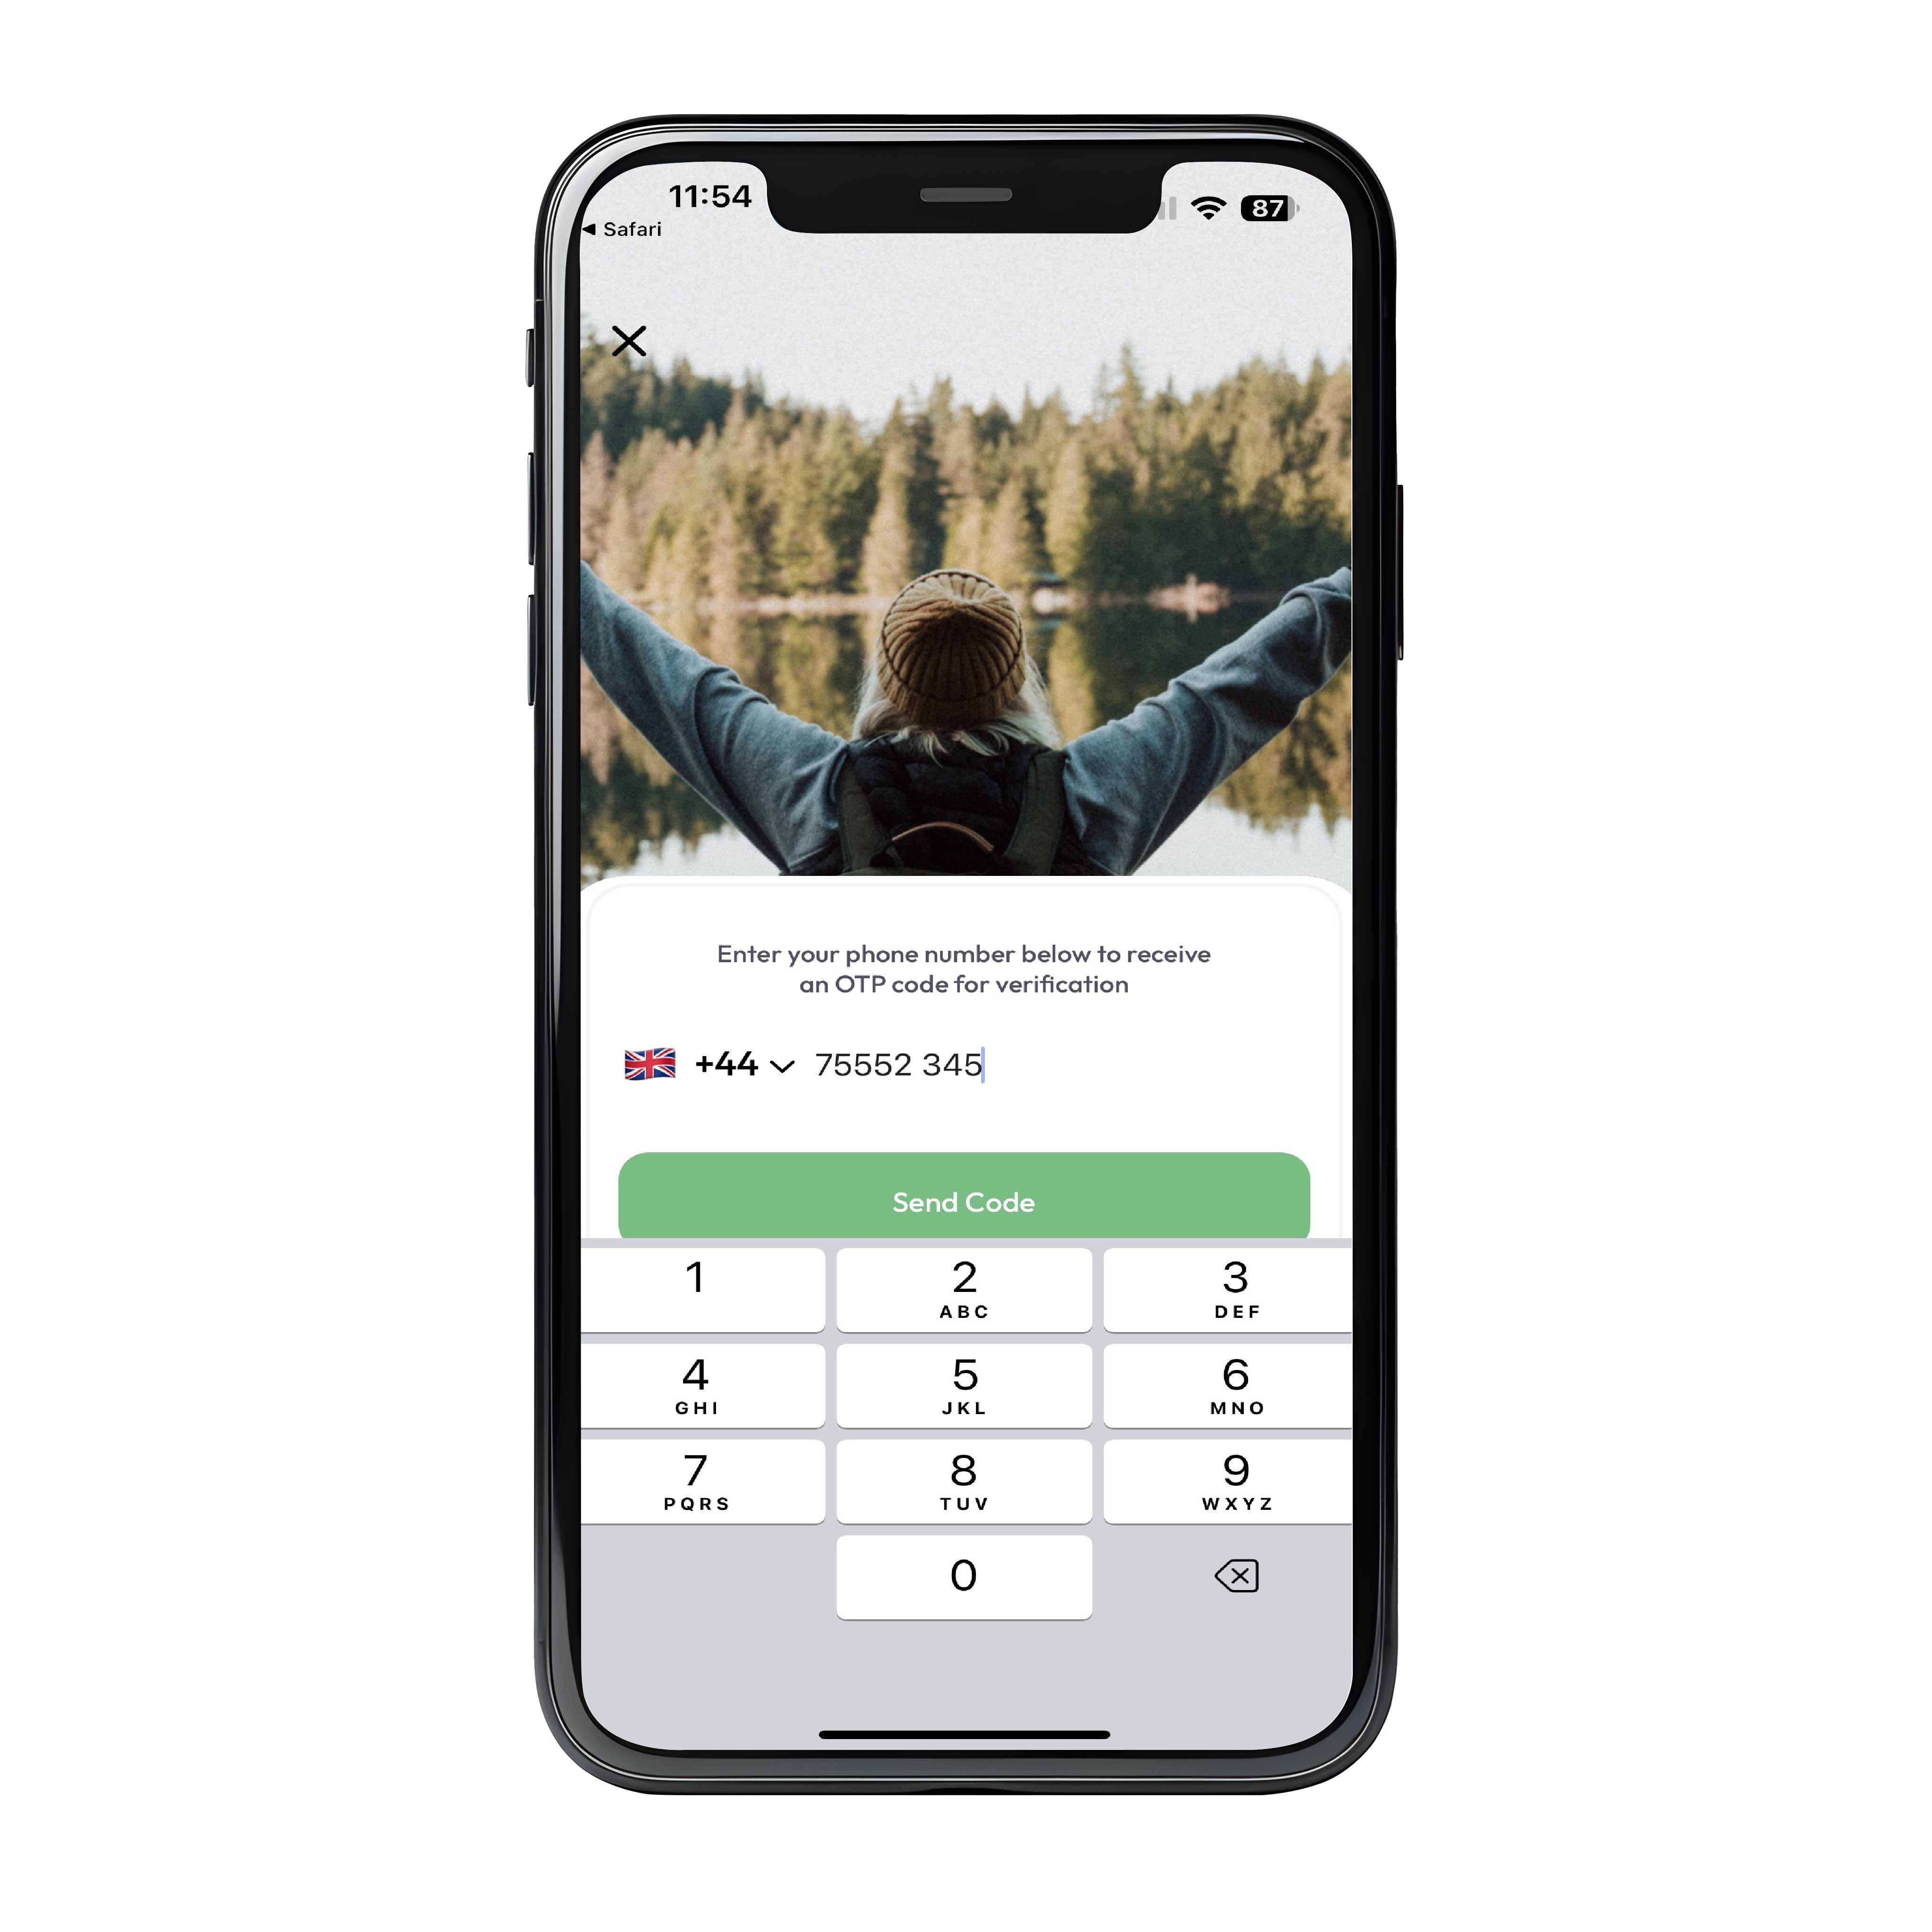
You need to let us know your mobile number so we can issue alerts and SOS messages accurately.
To do this enter your mobile number and then enter the code that is sent to you via SMS to log in.

You're All Set!
Log in Complete
Accept the Meili Terms & Conditions of use and you are ready to go.
Click Start using Meili Earth to go to the home page and start adding your Meili GPS Tracker(s) to your account.
The Home Screen
Adding Your Meili GPS Trackers to Your App
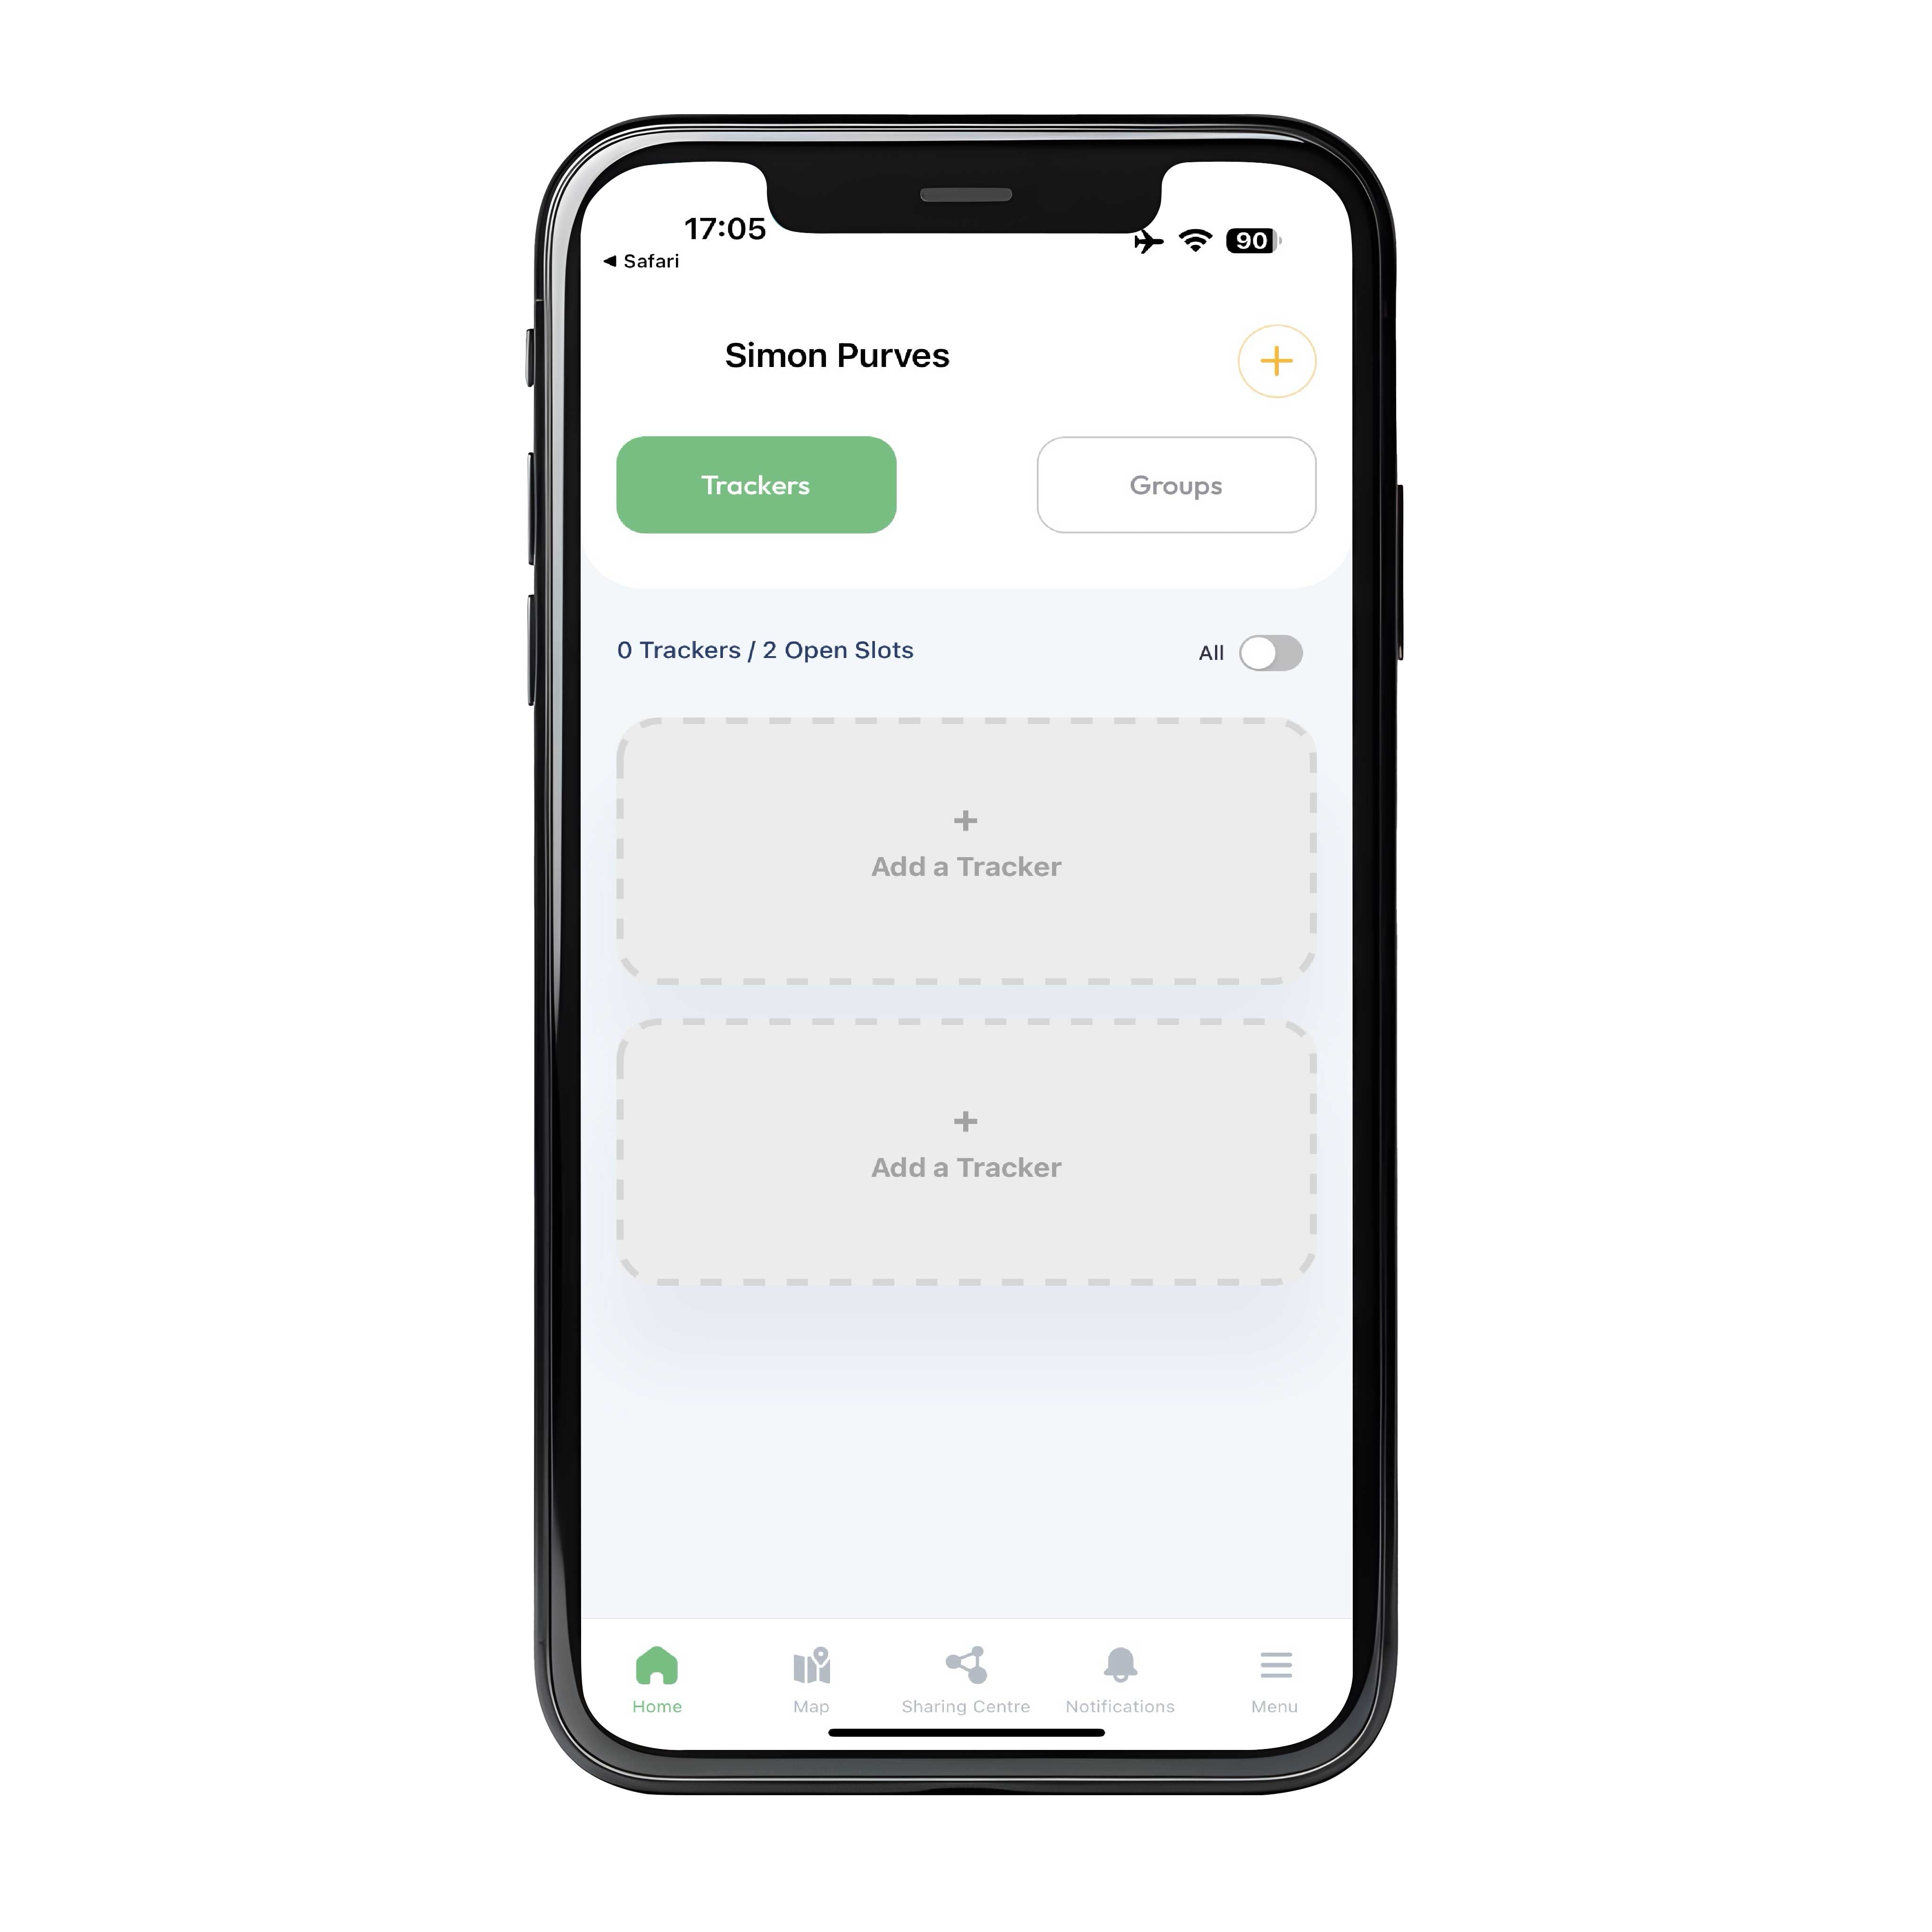
This is the Home Screen.
You can see that in this example we have two slots available. If you don't see any slots make sure you have signed up for a Global Airtime Plan on our website and that you signed into the app with the same e-mail address you used for the airtime plan.
Note if you have a sharing code from someone who has invited you to view their Meili GPS Trackers, click the Sharing Centre to enter your code.
Power On Your Meili GPS Tracker
Step 1
Before you can add a Meili it needs to switched on and connected to our network.
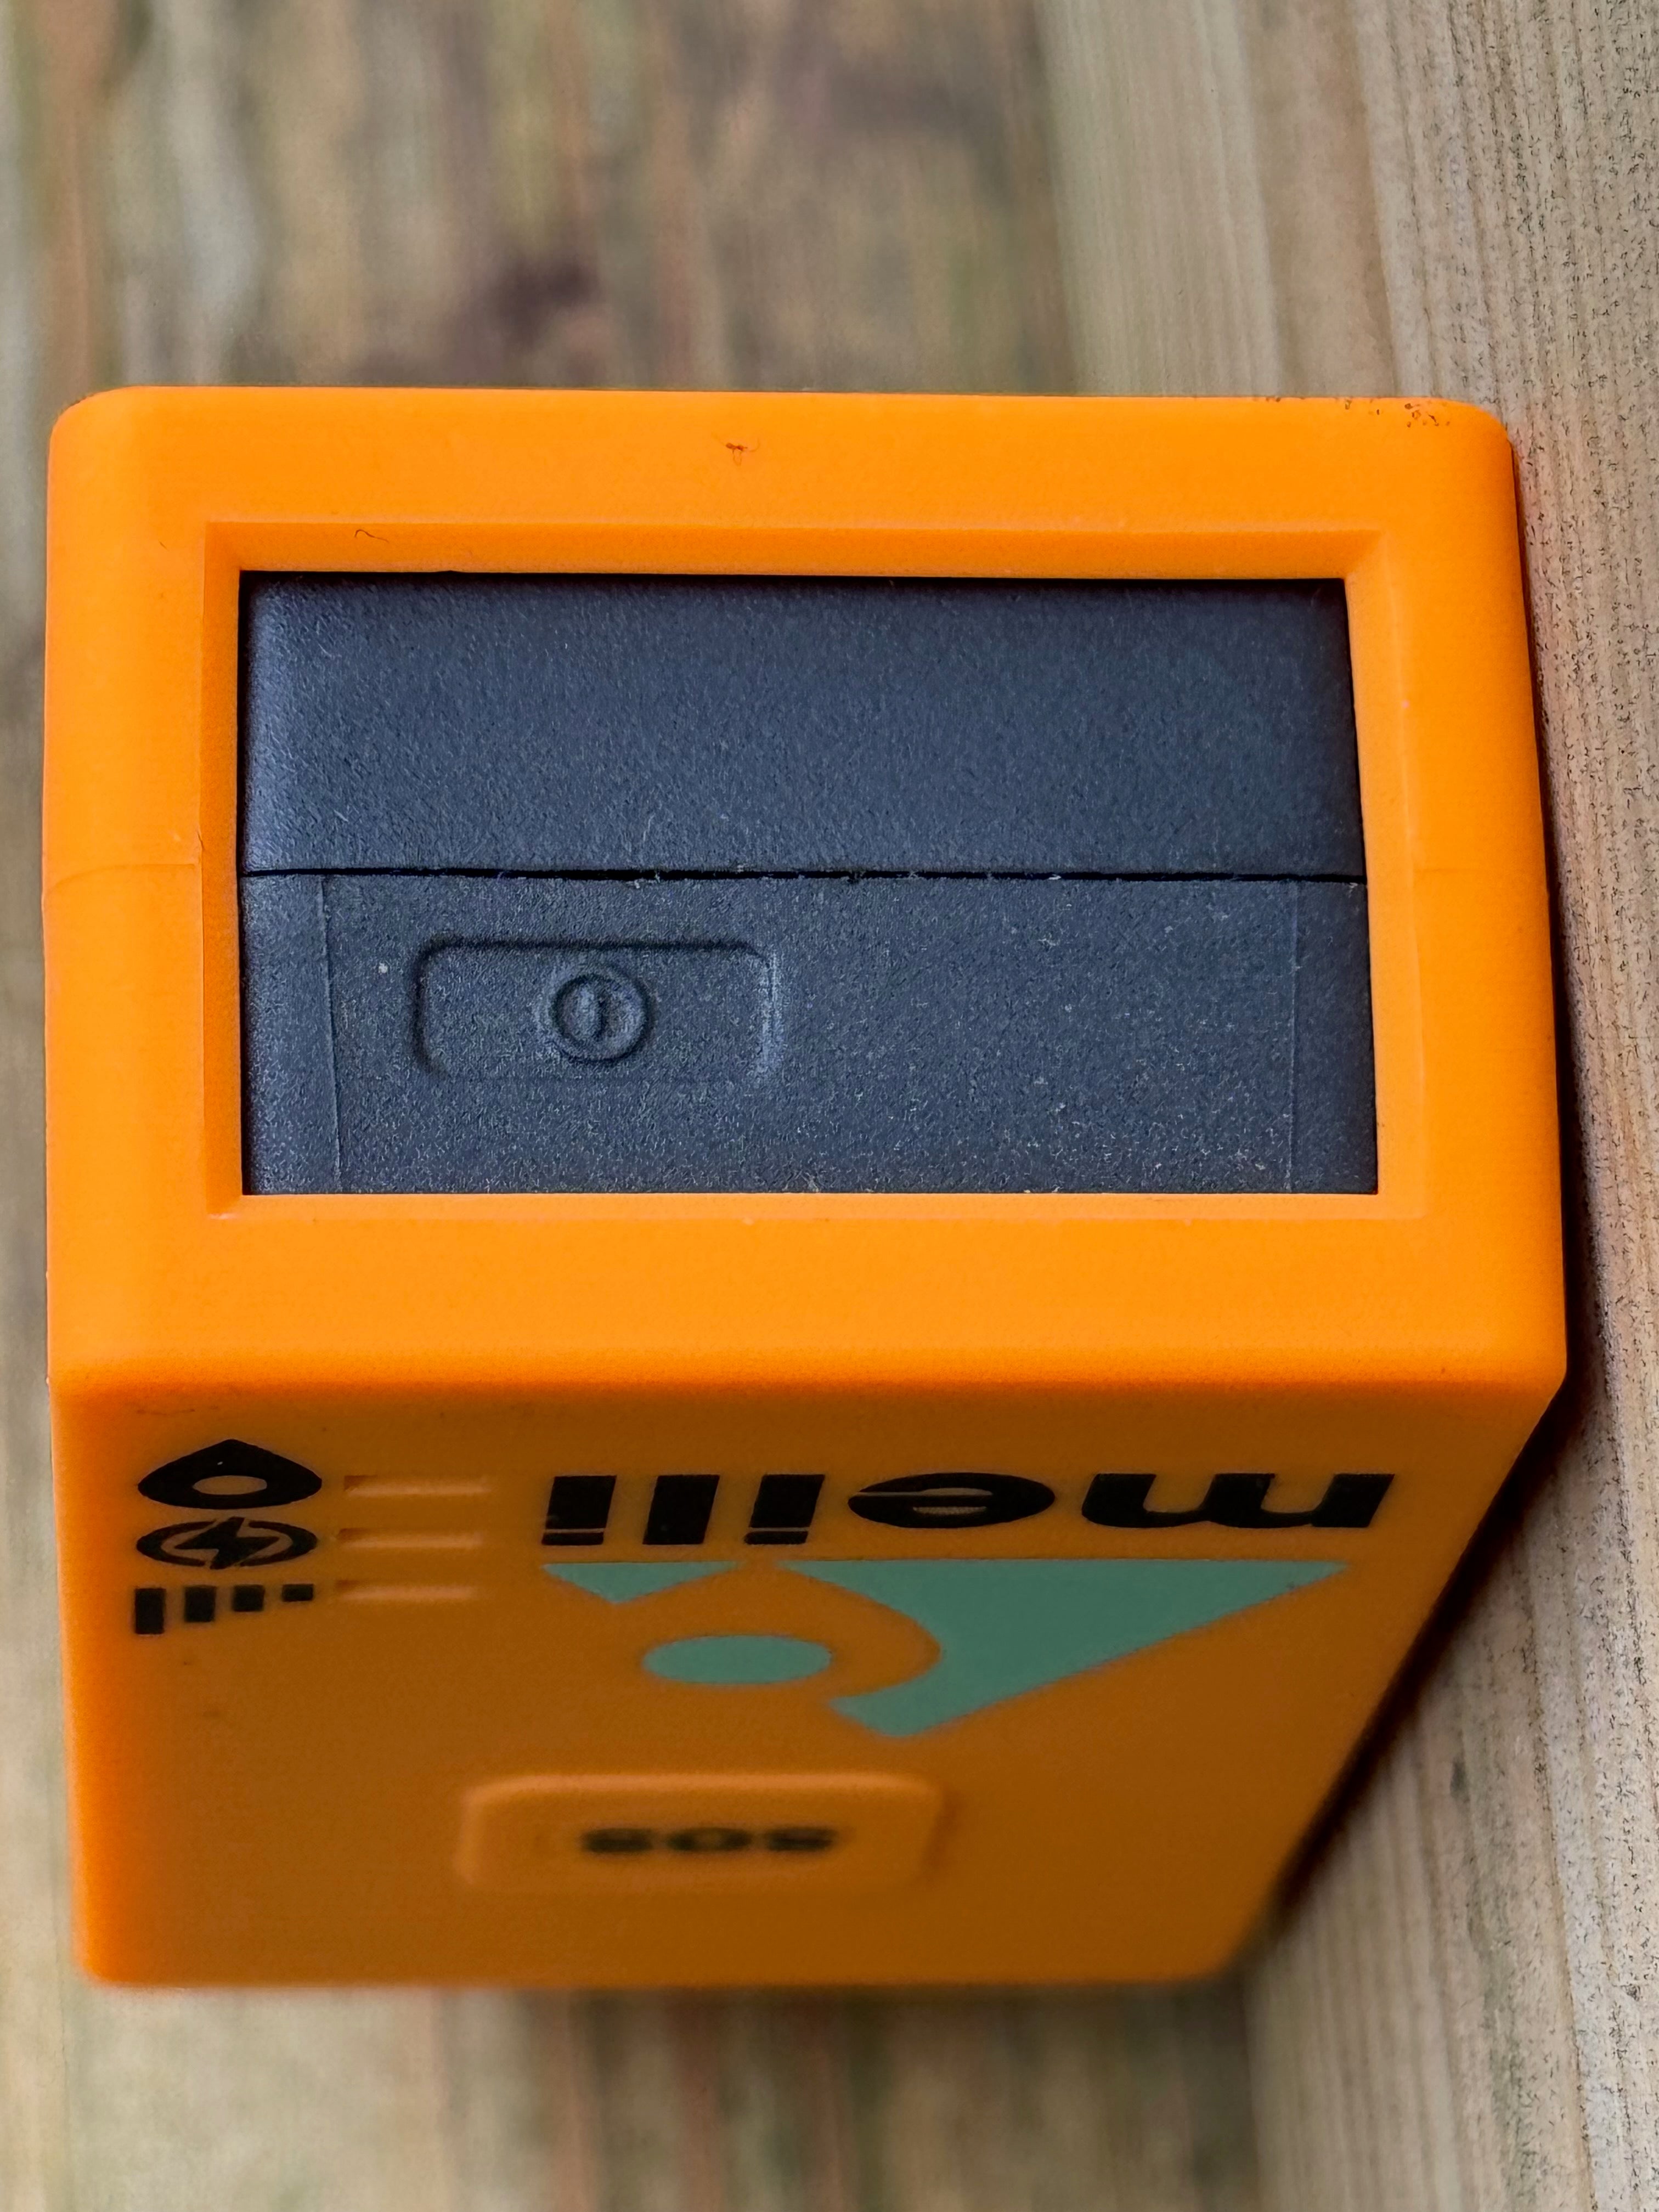
Press the power button on the base of the Meili with you finger nail until the red power light turns on.
(The button is recessed and quite difficult to press. This is intentional to prevent it from being accidentally turned off whilst in use.)
Note!! Wait for the Green network light to change from flashing quickly to slowly (Once every two seconds) before moving to the next step.
Add your Meili GPS Tracker to your Meili Earth App
Step 2
Add you Meili GPS Tracker to the app:
Either a) Click on the Plus icon in the top right corner of the home page or b) select an open slot marked 'Add a Tracker'.
Then follow the on screen instructions, and Scan the QR code either on the Meili GPS Tracker itself or on the back of the Quick Start Guide that came in the box.
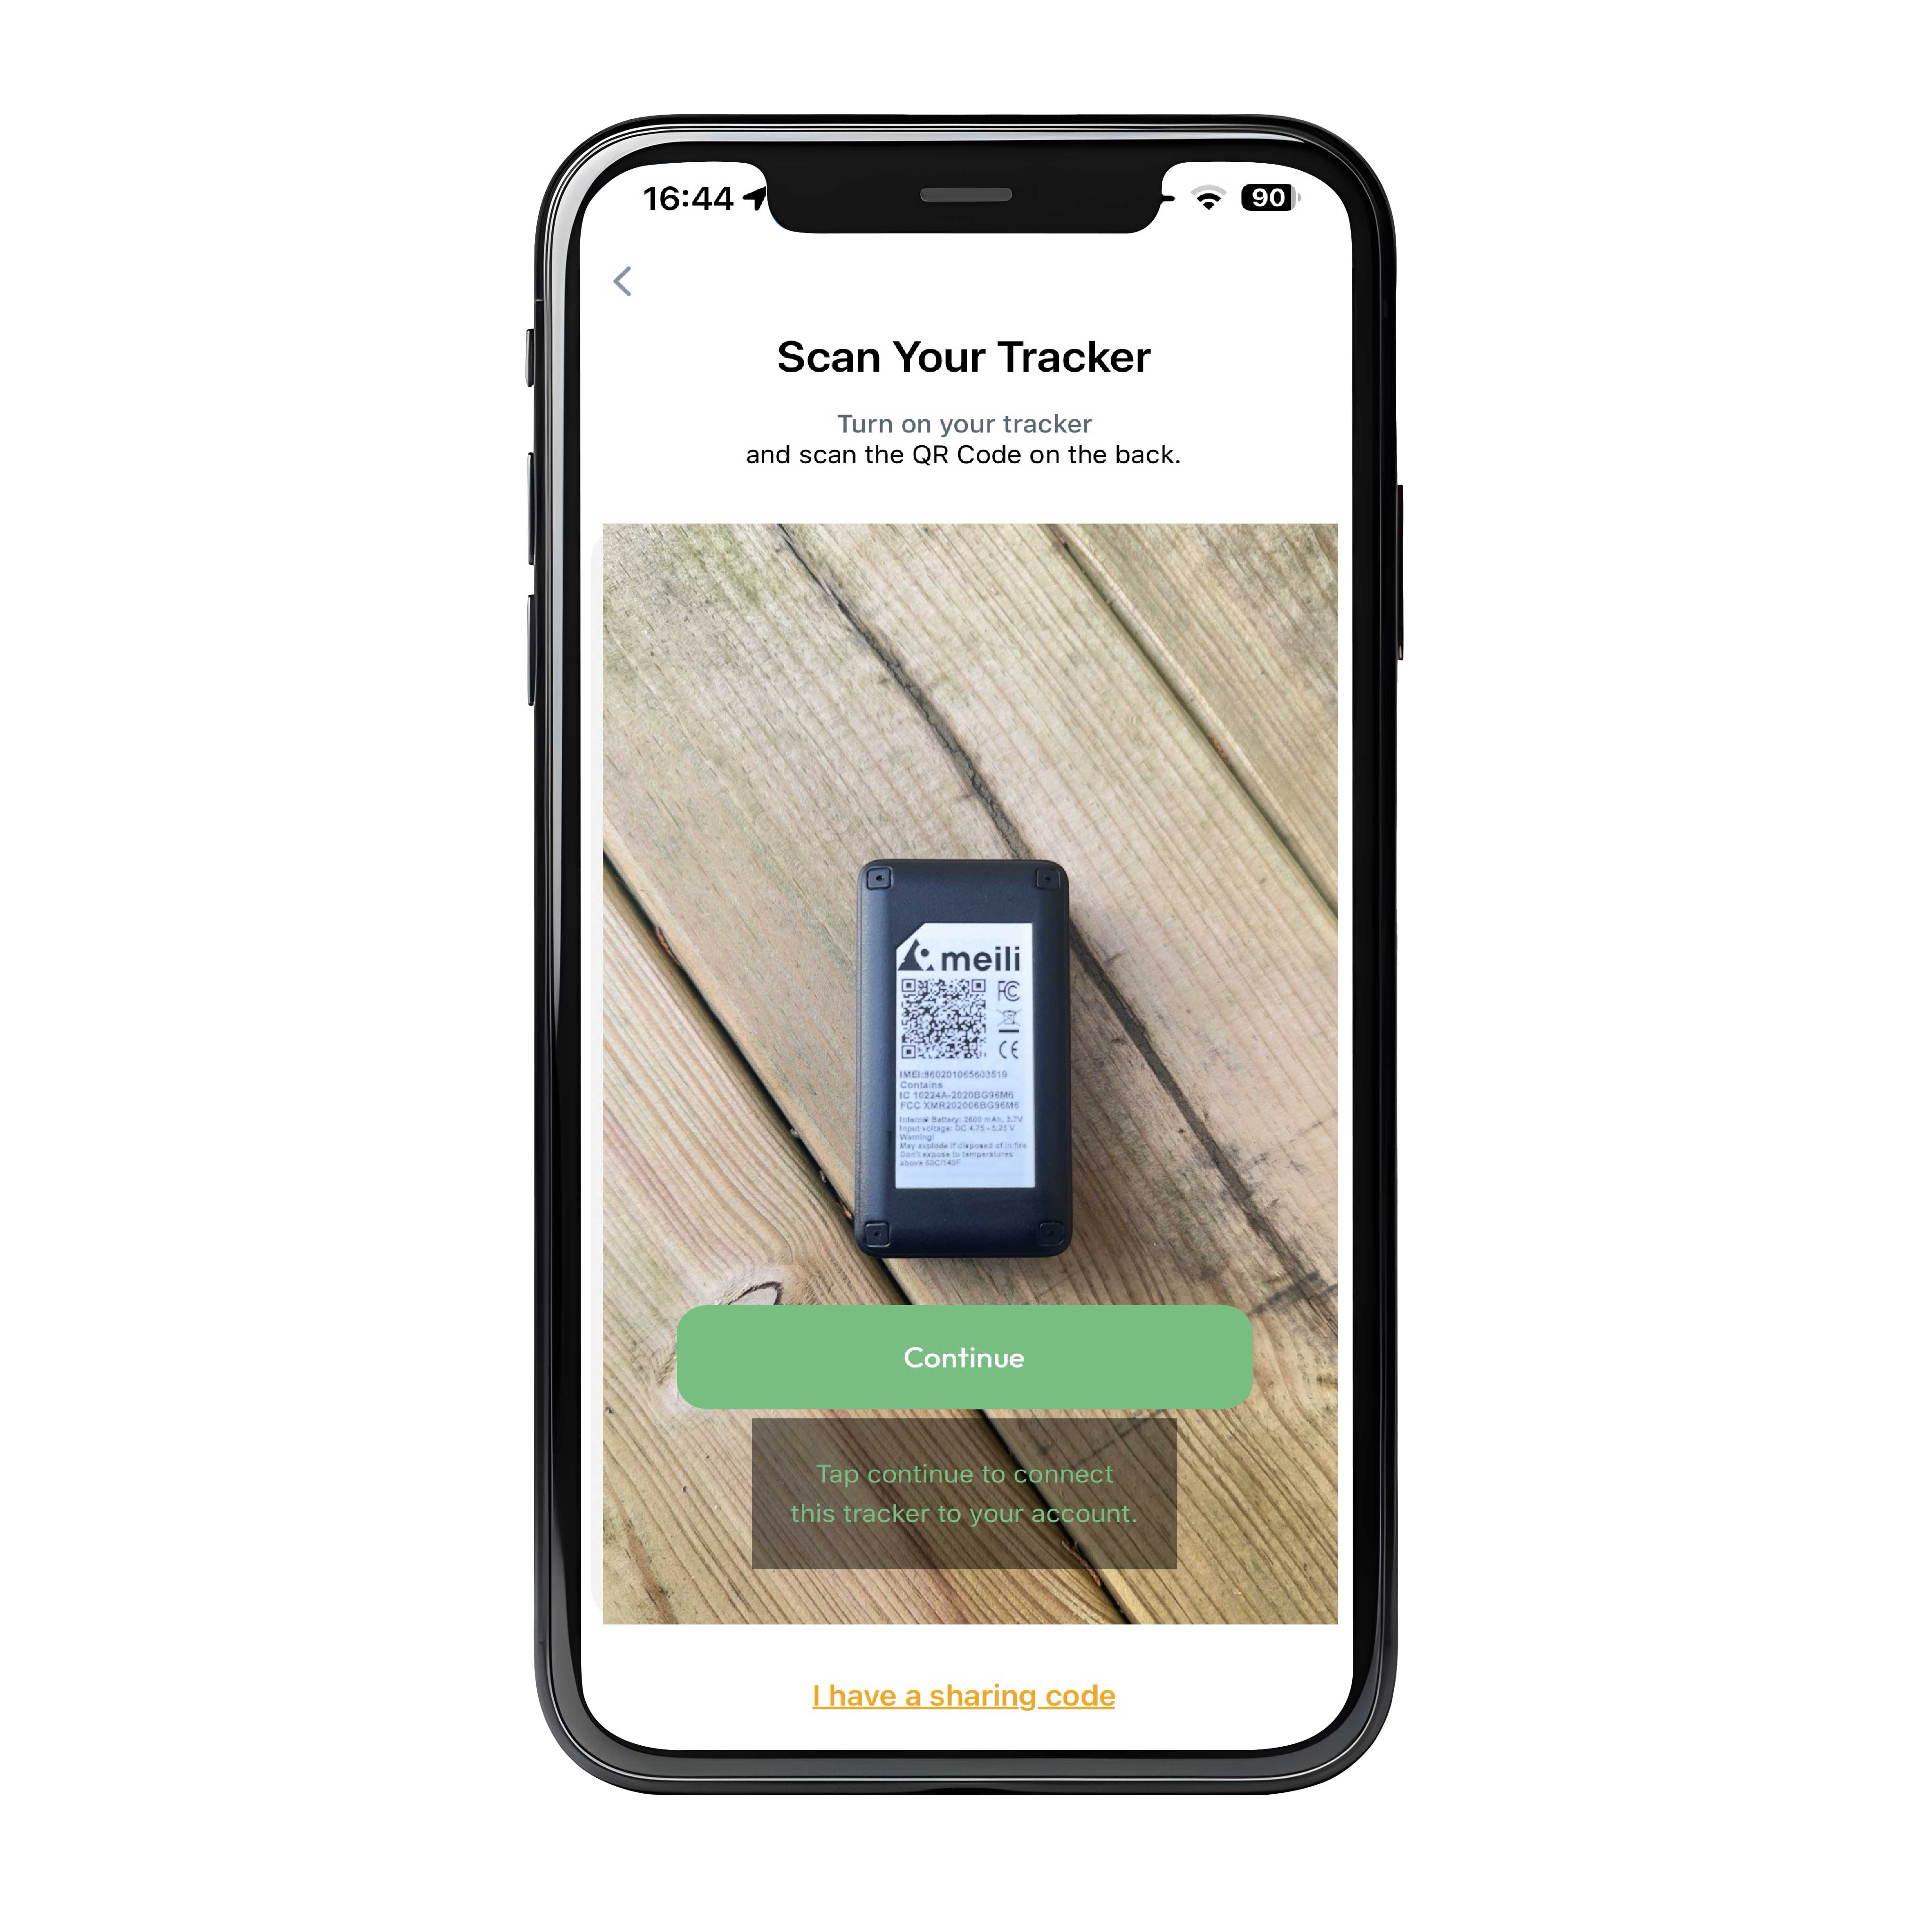
Scan the QR Code of your Meili GPS Tracker
Step 3
You can either:
a) Scan the QR code on the front of the Getting started guide (which you will find in the box), or
b) you can slide the Meili out of its silicon case and scan the QR code on the back.
To scan, start with the phone close to the QR code and move it slowly away until you see the Green Continue Button appear.
Click the button to add this Meili GPS Tracker to your account.
If you see a message saying you don't have any open tracker slots, click on the 'Add more tracker slots' button to go to our website and purchase additional slots.
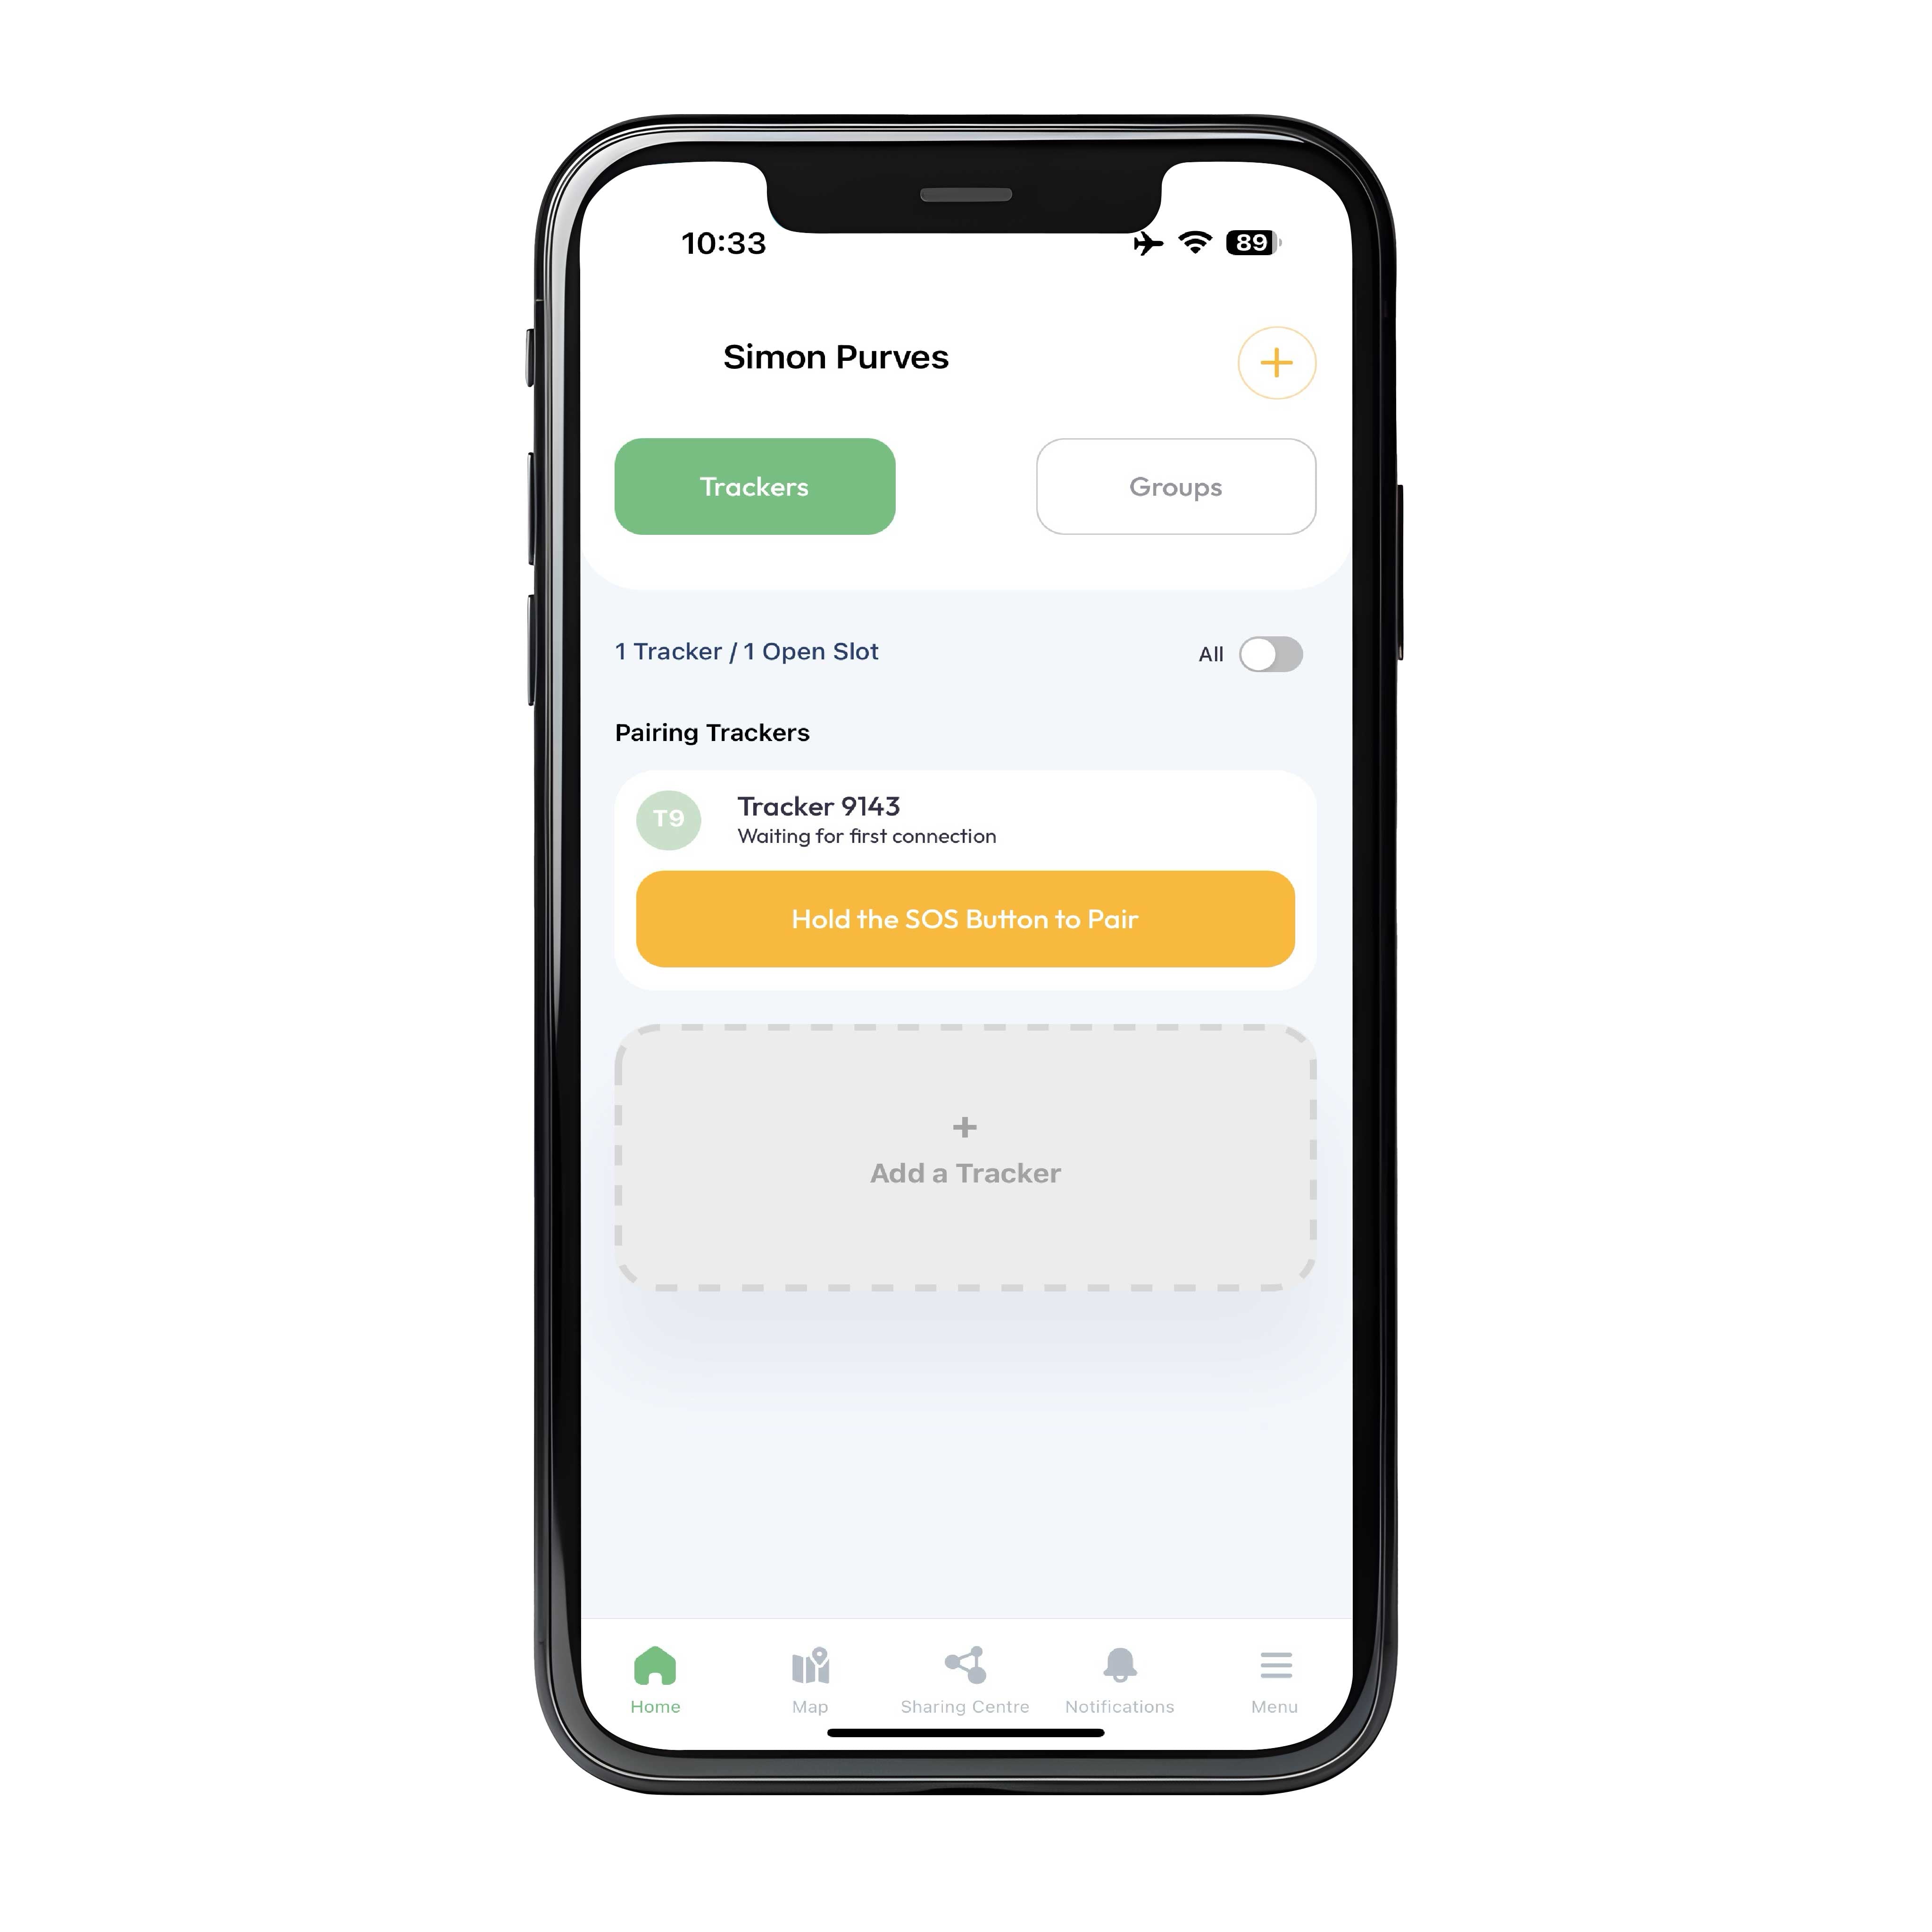
Pair Your Meili
Step 4
It's important to wait until the green network light on the Meili is flashing slowly before you try to pair it. If the light is flashing quickly, that means that the Meili GPS Tracker isn't online yet.
Once the green light is flashing slowly, (every 2 secs) press and hold the SOS button until the Meili vibrates and then release the SOS button.
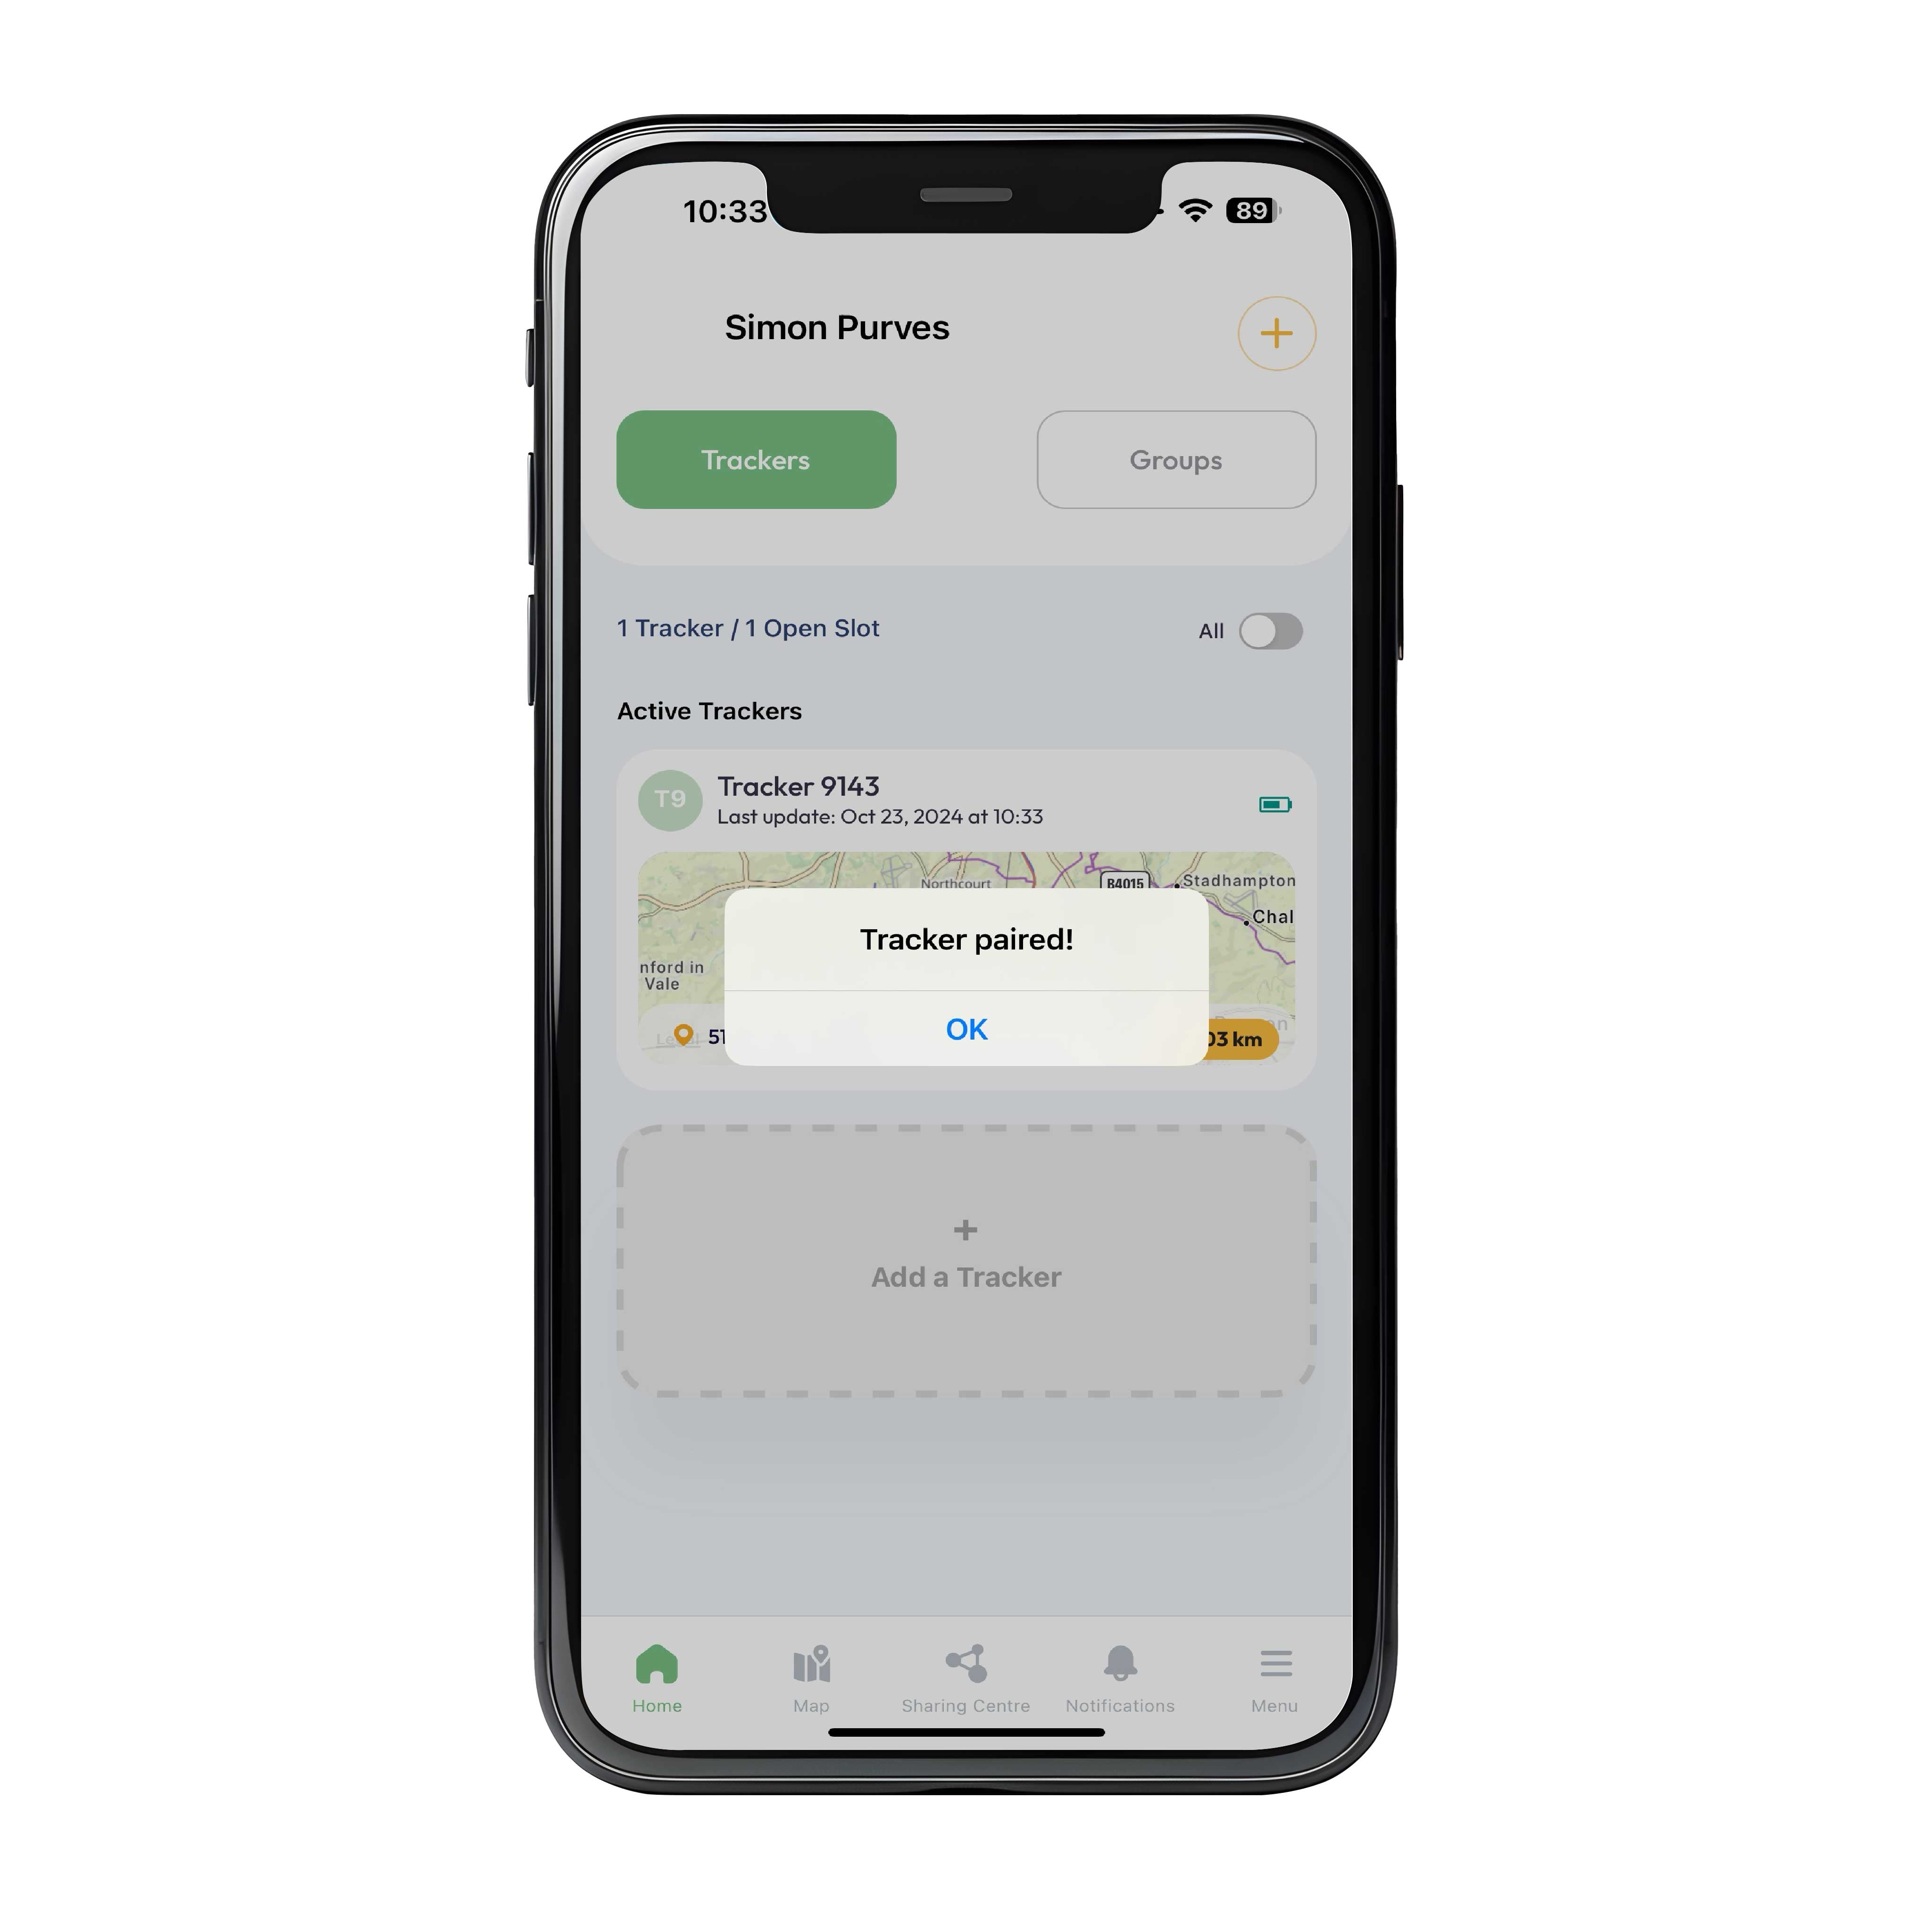
Tracker Paired!
Step 5
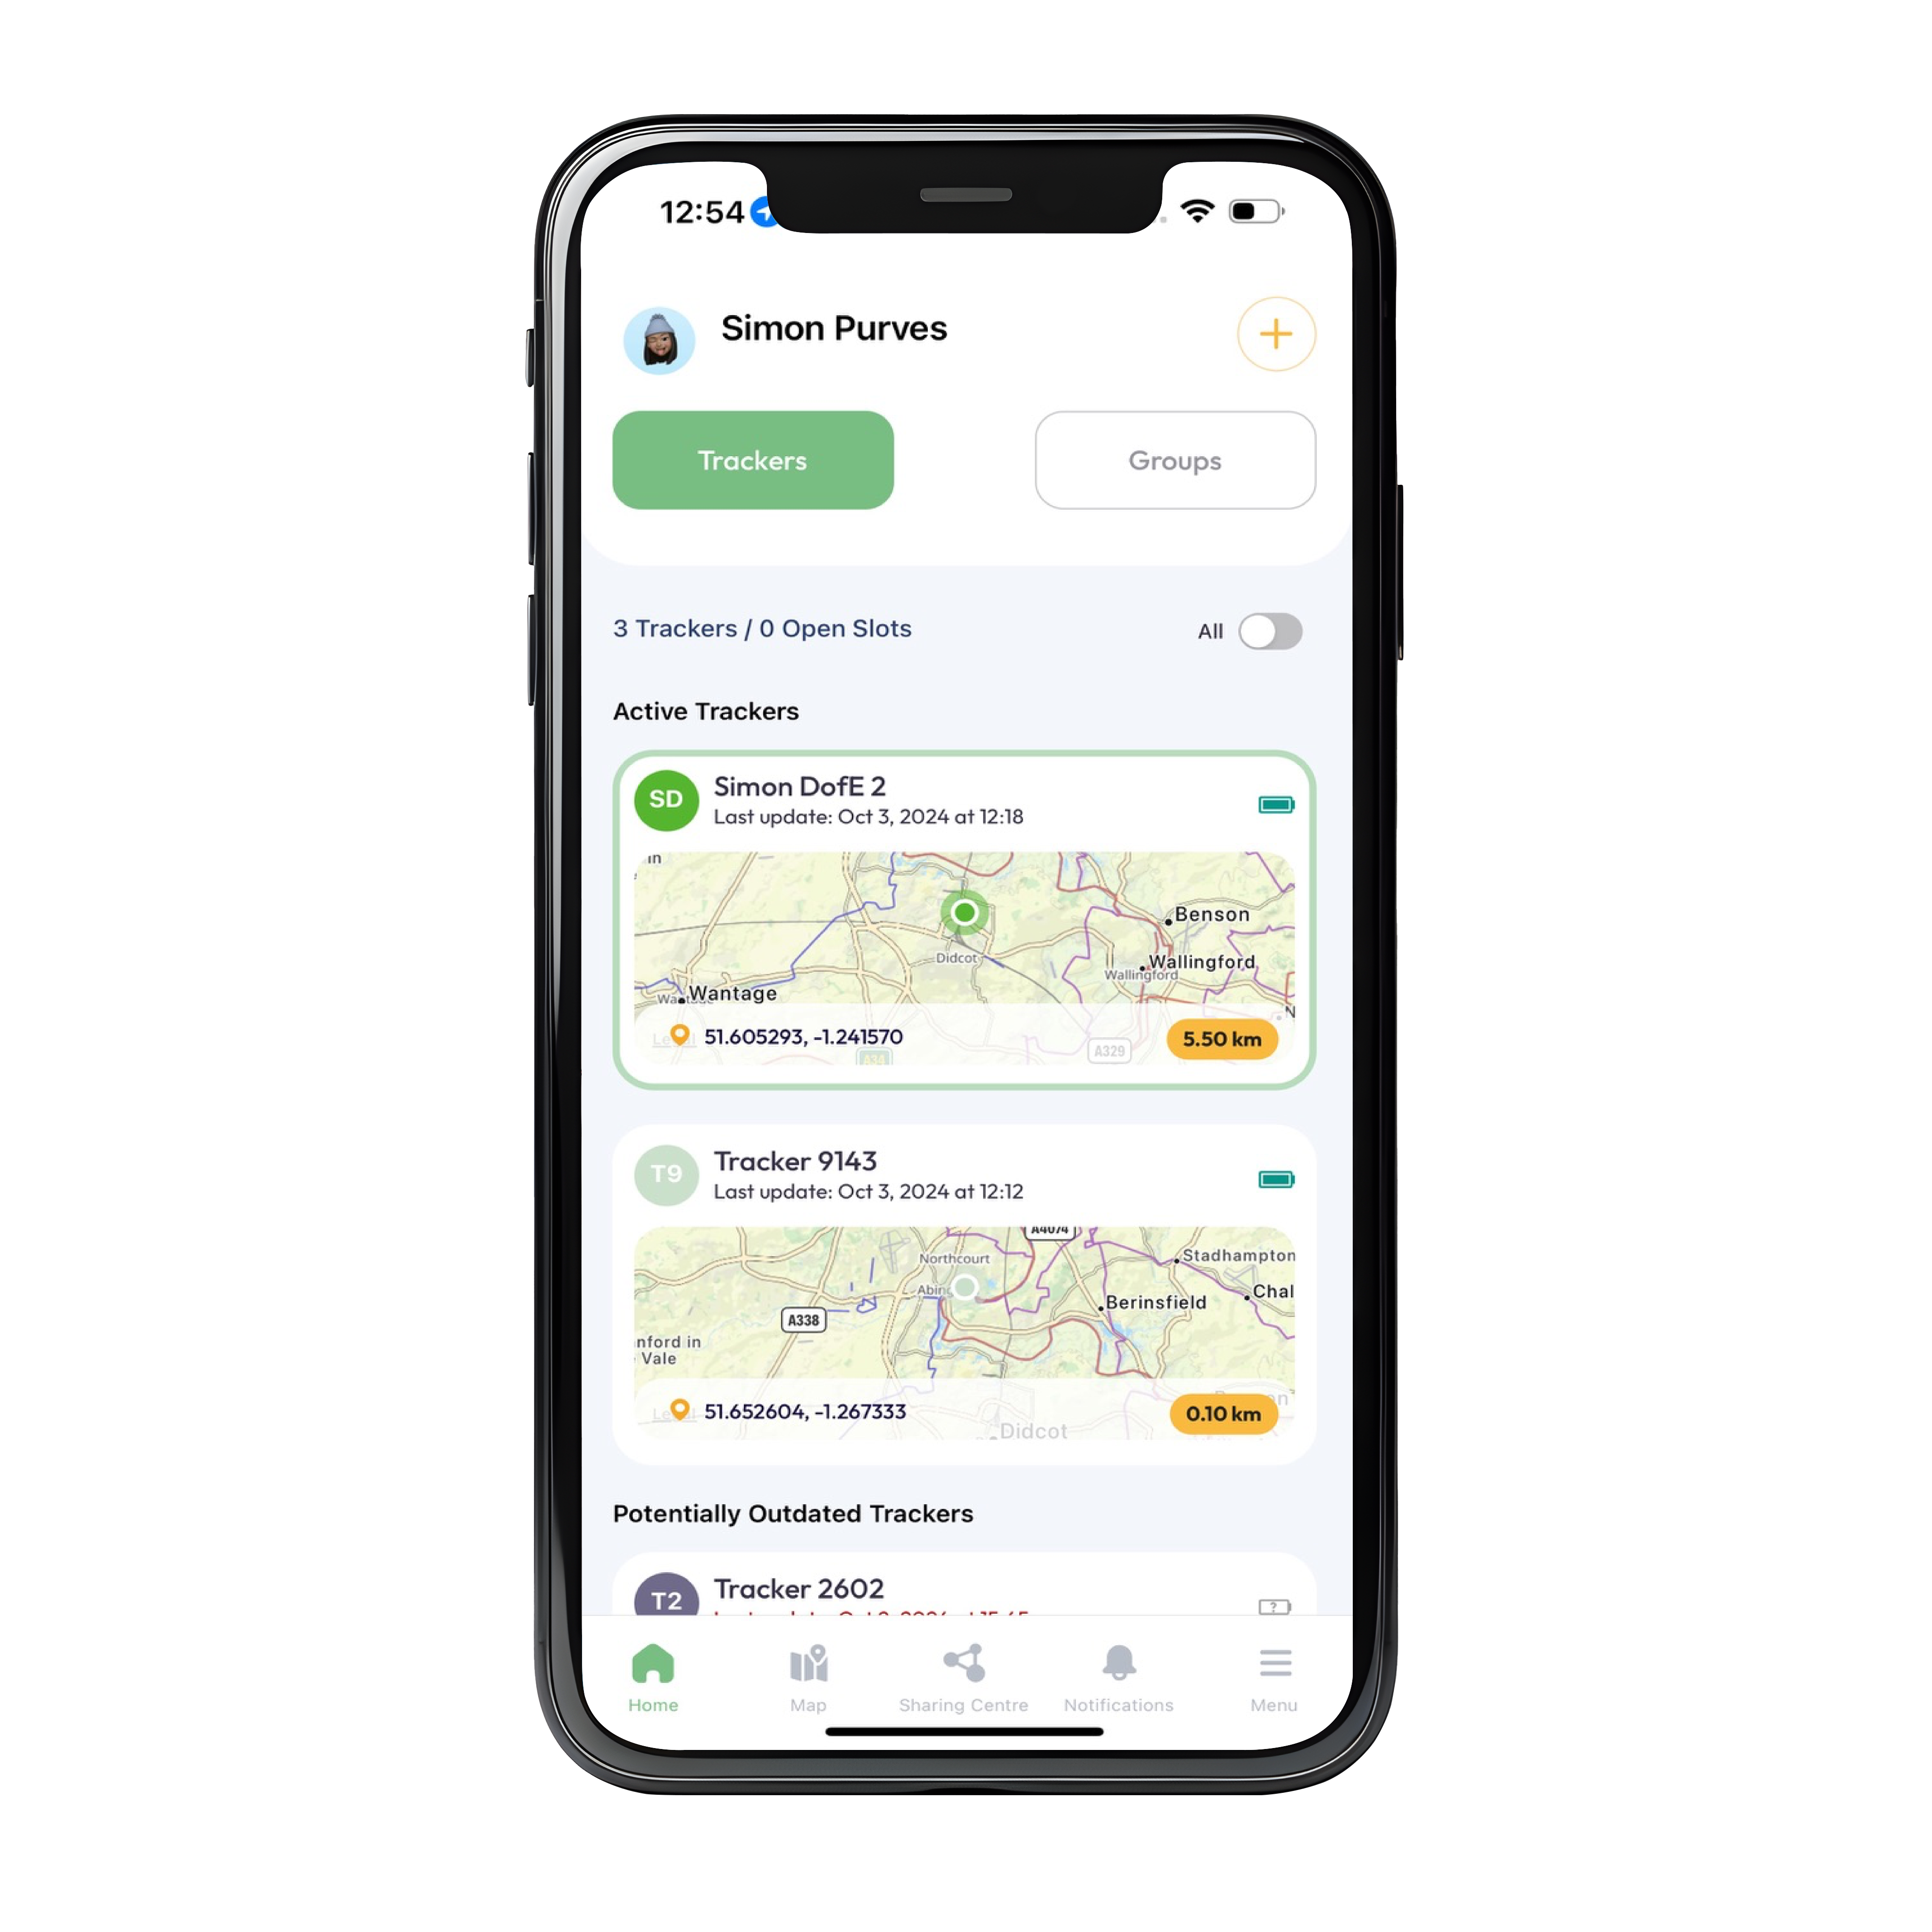
That's it. You have successfully paired your first Meili. Click 'ok' and you will see the Meili displayed on your Home Screen.
